
| Quick Summary |
|---|
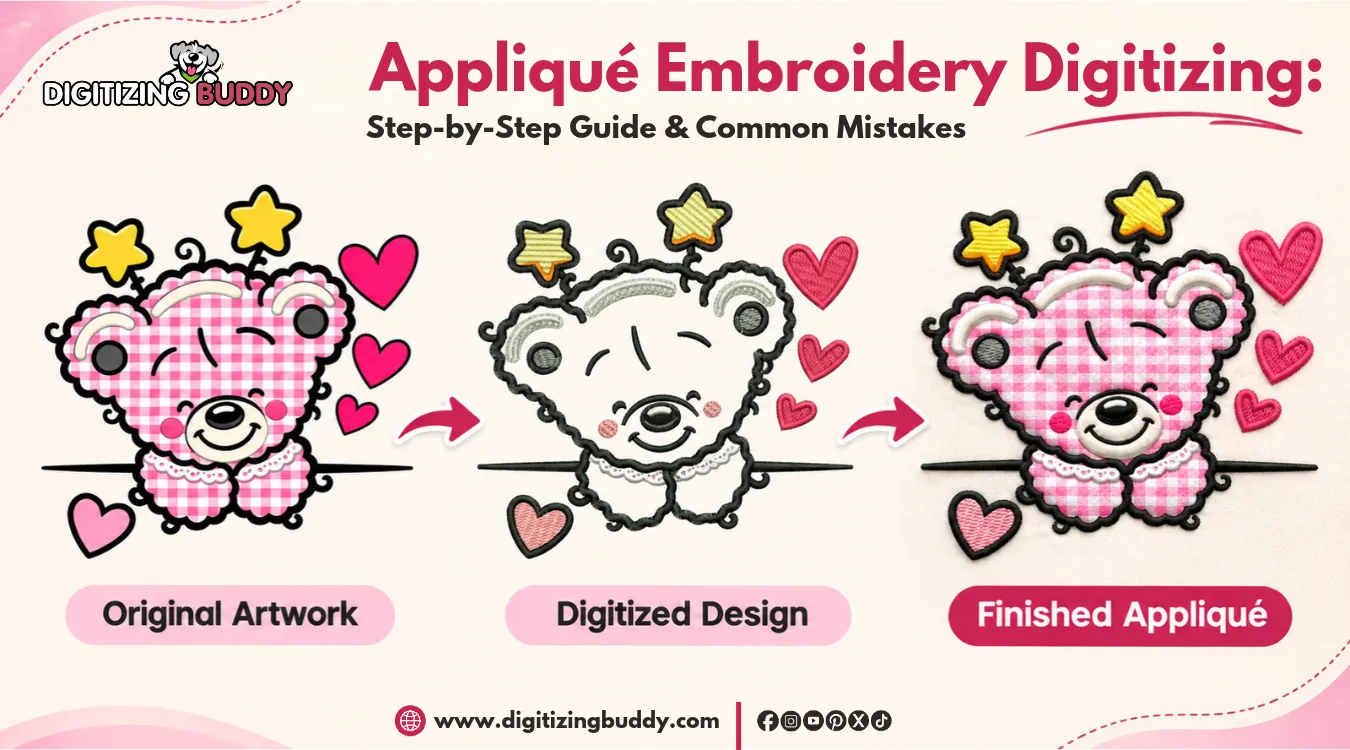
Appliqué embroidery combines fabric pieces with machine stitches to create bold, textured designs.
|
The fabric piece on your sweatshirt looks perfectly placed. But when the machine finishes, the satin border misses an edge, or the fabric starts to pucker. Your design looks uneven, even though the artwork seemed fine.
However, clean appliqué takes more than a good-looking shape. You need accurate stitch planning, the right fabric, careful cutting, and a machine setup that holds every layer in place.
This guide explains how to prepare machine-ready appliqué files, follow the stitch sequence, and avoid mistakes that waste time and materials. For tricky logos and complex appliqué designs, rely on skilled manual embroidery digitizers to prepare accurate stitch sequences, clean fabric outlines, and machine-ready files.
- Quick Answer: How Appliqué Digitizing Works?
- What Is Appliqué Digitizing, and When Should You Use It?
- Step-by-Step Appliqué Digitizing Process
- Pre-Cut vs. Trim-in-Place Appliqué
- Choosing the Right Fabric and Stabilizer
- Which Stitch Settings Matter Most?
- Common Appliqué Digitizing Mistakes and Fixes
- Is Appliqué Better Than Full Stitch Embroidery?
- When Should You Hire a Professional Appliqué Digitizing Expert?
Quick Answer: How Appliqué Digitizing Works?
Appliqué digitizing turns artwork into machine instructions for attaching fabric shapes to clothing. Instead of filling large areas with thread, the machine secures fabric pieces and stitches around their edges. This method works well for bold letters, logos, and shapes.
The process uses three main stitch types:
- Placement stitches mark where the fabric goes.
- Tack-down stitches hold the fabric in place.
- Cover stitches secure and finish the edges.
However, some designs also need cutting lines and machine stops for fabric placement or trimming. Proper backing, careful cutting, and correct stitch order keep the edges clean and secure.
What Is Appliqué Digitizing, and When Should You Use It?
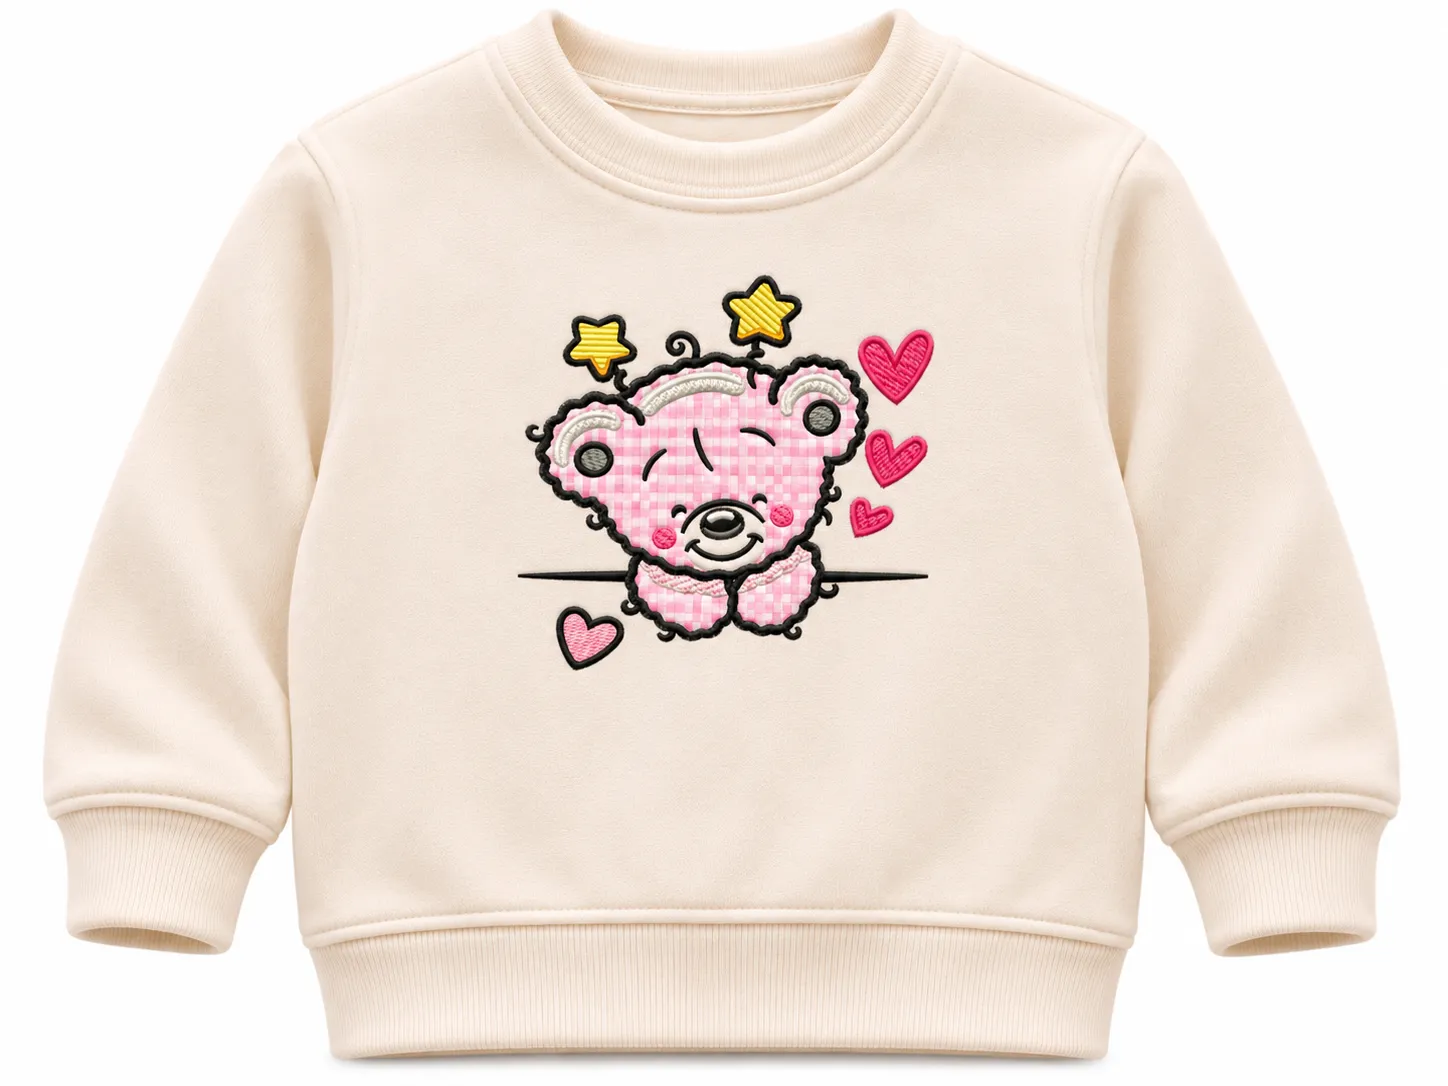
Appliqué digitizing prepares a design so an embroidery machine can attach cut fabric to a garment. Instead of covering every large area with thread, the design uses fabric as the main fill. Stitches hold and finish the edges, giving the artwork a bold look and a different texture.
1. Best Projects for Appliqué
This method works especially well for varsity letters on jackets, large team logos, and simple graphics on sweatshirts. It also adds color and texture to children’s clothing without filling the entire shape with dense stitches.
For example, a large letter on a school jacket may use twill fabric inside the outline. This keeps the letter bold while reducing the number of fill stitches.
2. When Standard Embroidery Works Better
However, appliqué is not ideal for every design. Tiny letters, thin lines, and complex shapes can be hard to cut and secure neatly. Standard embroidery often handles these details more accurately. Choosing the right method starts with the artwork and its final size.
Step-by-Step Appliqué Digitizing Process
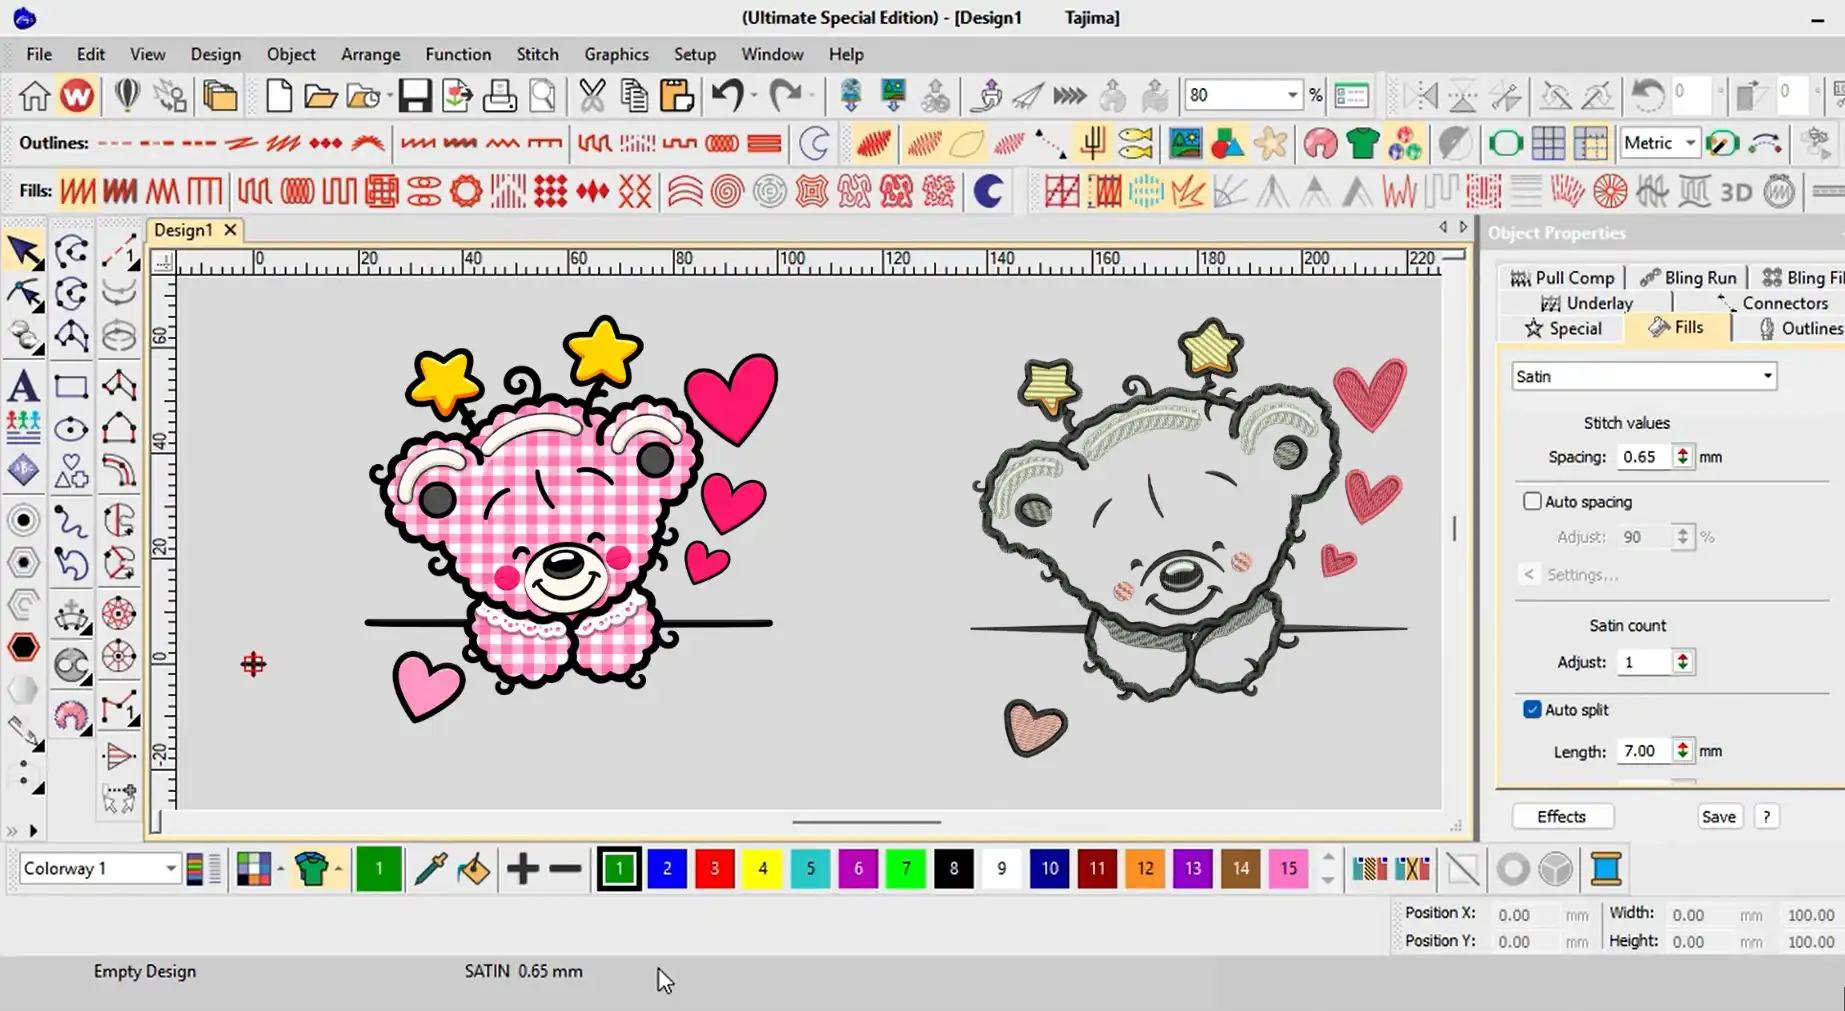
A clean appliqué design starts with a file that tells the machine where to stitch and when to pause. Follow these five steps to plan it for a sweatshirt or jacket.
Step 1: Prepare the Artwork
Open your logo or lettering in Wilcom, Hatch, or similar embroidery digitizing software. Set the final size before building stitches. Clean rough edges and remove tiny details that would be hard to cut from fabric.
For example, a wide varsity letter is easier to sew than a shape with narrow gaps.
Step 2: Create the Placement Stitch
Trace the fabric shape with a simple running stitch. This outline marks the exact area for the appliqué on the hooped garment.
During sewing, the machine stitches that line and pauses so the operator can lay the fabric over it.
Step 3: Add the Cutting Line and Tack-Down Stitch
For trim-in-place appliqué, add a cutting guide and a tack-down that holds the fabric before trimming. Some designs combine these into one stitch stage. Remove the hoop from the machine and trim excess fabric near the guide without unhooping it.
However, pre-cut pieces already have their shape, so they may not need a stitched cutting line.
Step 4: Set Machine Stops and Finishing Stitches
Add pauses where the operator must place or trim fabric. Depending on the machine, these may use stop or color-change commands.
Then add a satin, zigzag, or blanket-style edge. Choose a finish that covers or secures the fabric edge without adding too much bulk.
Step 5: Preview, Export, and Test
Use the stitch player in Wilcom or Hatch to review the order, pauses, color changes, and final size. Watch for missing steps or long jumps.
Save the editable source file. Then export a compatible embroidery file format, such as PES or DST, for your machine. Finally, test on a similar fabric and stabilizer. Check border coverage and adjust the file before sewing the finished garment.
Watch this step by step appliqué digitizing tutorial to see how artwork becomes a machine ready design. The video covers placement stitches, tack-down stitches, finishing borders, and proper stitch sequencing.
Pre-Cut vs. Trim-in-Place Appliqué
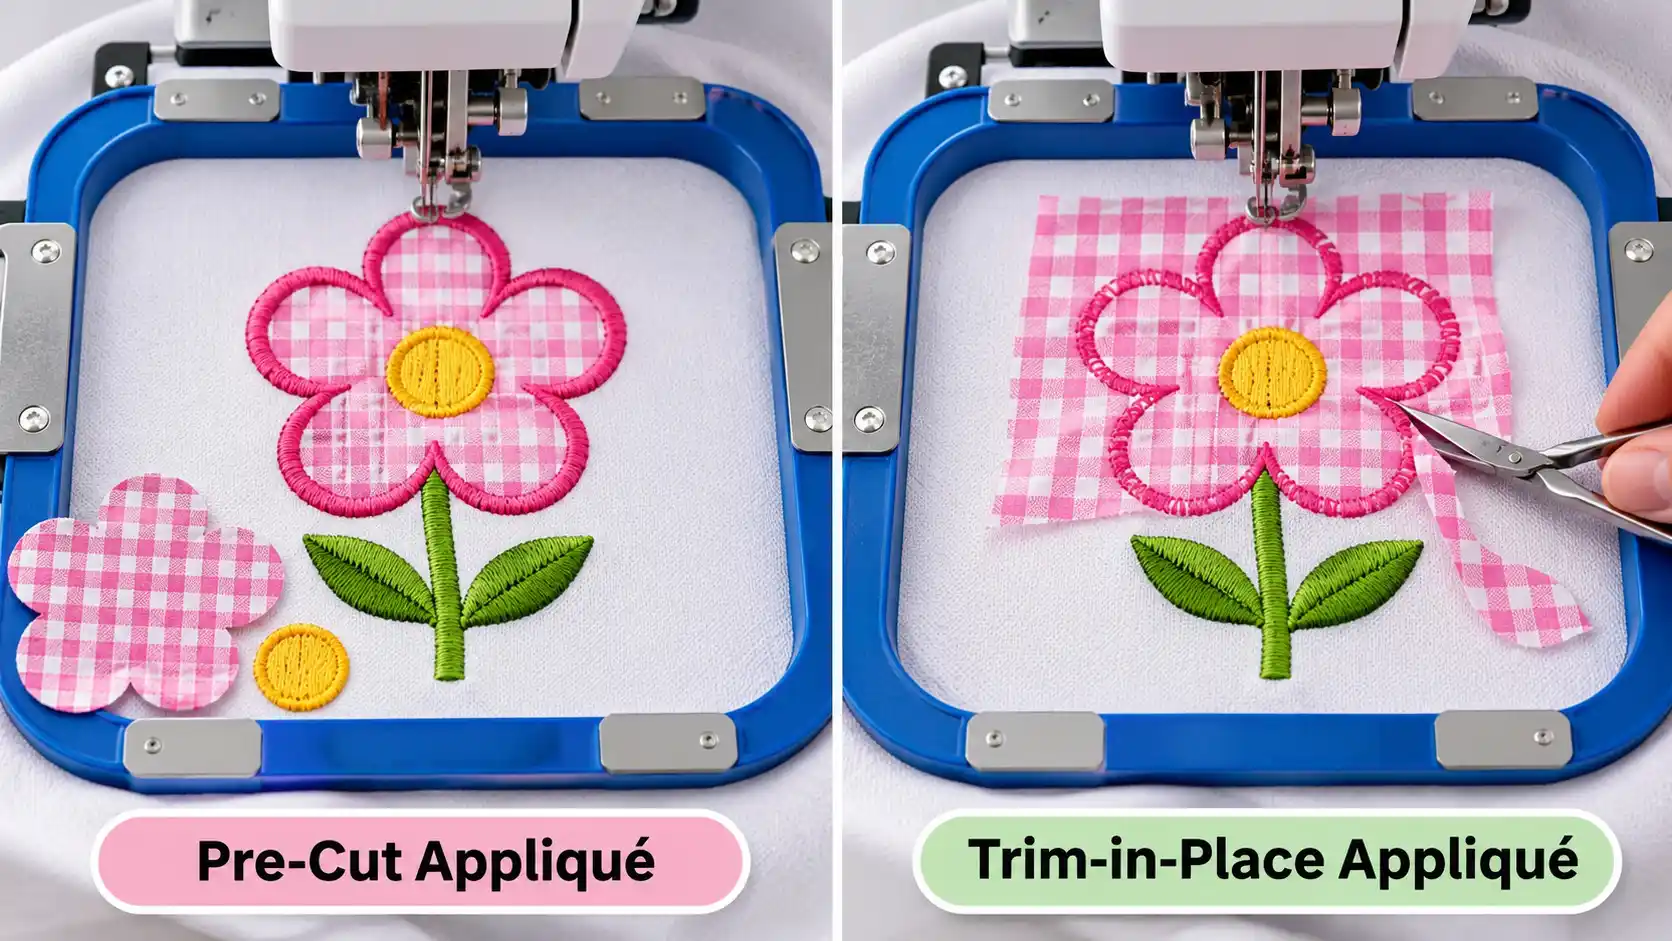
Both methods attach fabric to a garment, but they differ in when you cut the shape. Your choice depends on the design, tools, and number of items you plan to stitch.
| Pre-Cut Appliqué | Trim-in-Place Appliqué |
|---|---|
| Cut fabric pieces before sewing, using scissors or a cutting machine. | Place fabric over the stitched outline, secure it, and trim away extra fabric during the stitch-out. |
| Works well for repeated varsity letters or team logos that need matching pieces. | Suits one-off designs when you do not have a separate cutting template. |
However, pre-cut pieces need accurate sizing and placement. A fabric cutter may require a separate SVG outline, while the PES or DST embroidery file tells the machine where to stitch and pause.
For trim-in-place, keep the garment hooped while removing the hoop from the machine to trim carefully. Then return it and stitch the finishing border.
Choosing the Right Fabric and Stabilizer
Fabric choice affects clean edges and how the design lasts after washing.
Best Fabrics for Appliqué
Cotton is light and easy to cut, but its raw edges can fray. Twill is stronger and works well for varsity letters and jacket logos. Felt holds its shape and usually frays very little. Fleece adds a soft, raised look, but its thickness can make small shapes harder to finish.
Also, use a wider cover stitch when you need to hide fraying edges, and test it on a fabric sample.
Stabilizer and Backing Selection
Knit shirts and sweatshirts stretch, so cut away stabilizer usually gives better support after washing. For firm woven fabrics, tear-away may work when the design is not too dense.
Meanwhile, fusible backing or a light spray of embroidery-safe temporary adhesive can keep fabric pieces from shifting. Always check that your backing suits the garment and test before stitching the final item.
Which Stitch Settings Matter Most?
Good appliqué depends on how each stitch holds the fabric and finishes its edge. The right settings change with the fabric, thread, design size, and cutting method.
Border Width and Stitch Density
A tack-down stitch secures the fabric before trimming or finishing. The cover stitch comes later. It hides raw edges with a satin border or secures them with a decorative finish, such as a blanket stitch.
The border must be wide enough to cover the fabric edge without becoming bulky. Meanwhile, stitch density should provide good coverage without pulling the garment tight. More stitches do not always give cleaner results.
Underlay, Pull Compensation, and Sewing Order
Underlay stitches support the finishing stitches, while pull compensation accounts for fabric movement during sewing. Both need careful testing because thick twill and soft fleece behave differently.
Also, stitch order matters. The machine must secure each fabric piece before trimming and finishing it. Preview the sequence and test a sample to catch gaps, shifting, or puckering.
Common Appliqué Digitizing Mistakes and Fixes
A design may look perfect on screen but stitch poorly on a sweatshirt. Before changing the file, check the fabric, stabilizer, hooping, and machine setup. Different problems often look alike.
Common Problems and What to Check
| Problem | What to Check and Fix |
|---|---|
| Raw edges showing | Check border coverage, trimming, and alignment. A narrow border or misplaced fabric can leave gaps. |
| Fabric shifting | Check tack-down placement. Use suitable fusible backing or light temporary adhesive to hold the piece. |
| Puckering | Check the stabilizer, hooping, stitch density, and thread tension. Avoid stretching the garment while hooping. |
| Uneven satin border | Review border width, underlay, and fabric movement. Test any changes on the same material. |
| Missing machine stops | Review the stitch sequence and confirm that the machine reads the stop or color-change commands correctly. |
What a Real Stitch-Out Reveals
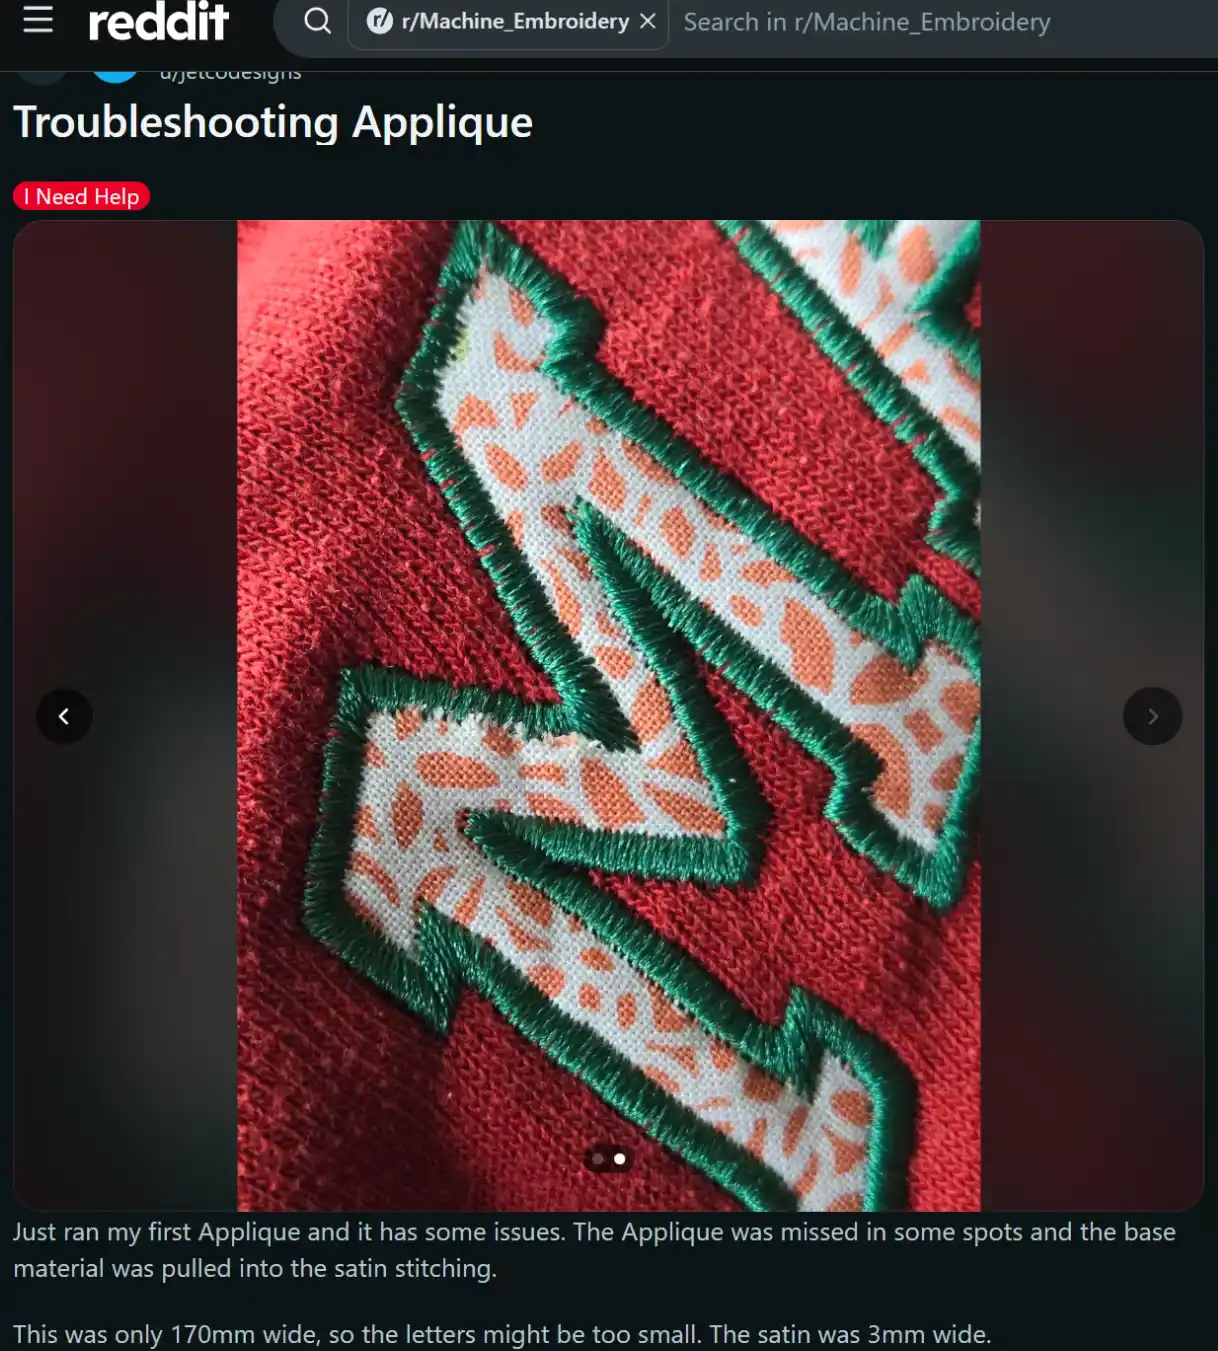
In a Reddit Machine Embroidery discussion, a user reported that satin stitching missed parts of laser-cut appliqué letters on an older sweatshirt. Other users suggested checking backing, fabric stretch, and stitch settings. Their ideas were troubleshooting suggestions, not a confirmed diagnosis.
Therefore, test the design on matching fabric before sewing a customer order. If the same gap appears in the same place each time, inspect the digitized border and its stitch order. If the problem moves around, check hooping, backing, and machine conditions.
For designs with several fabric pieces, confirm each layer is secured before adding the next. Otherwise, earlier pieces may shift.
A short test stitch-out may save an entire garment from costly repairs.
Is Appliqué Better Than Full Stitch Embroidery?
Neither method is better for every project. The right choice depends on the design, fabric, size, and finish you want.
When Appliqué Works Best
Appliqué uses cut fabric to fill large shapes. It works well for varsity letters, bold sweatshirt graphics, and team logos. It also adds texture without stitching every part of the design.
However, the operator must cut, place, secure, and sometimes trim each fabric piece. These steps take time, even when the file has fewer stitches.
When Full Stitch Embroidery Makes Sense
Full stitch embroidery builds the artwork with thread instead of fabric pieces. It offers better control for small lettering embroidery, fine details, and shaded designs that use several thread colors. It also avoids separate fabric cutting.
Still, dense stitching may take longer and needs a suitable stabilizer to prevent puckering.
For a large, simple letter, choose appliqué. For a detailed logo, regular embroidery may deliver a cleaner result. Always compare the full production process, not just stitch count.
When Should You Hire a Professional Appliqué Digitizing Expert?
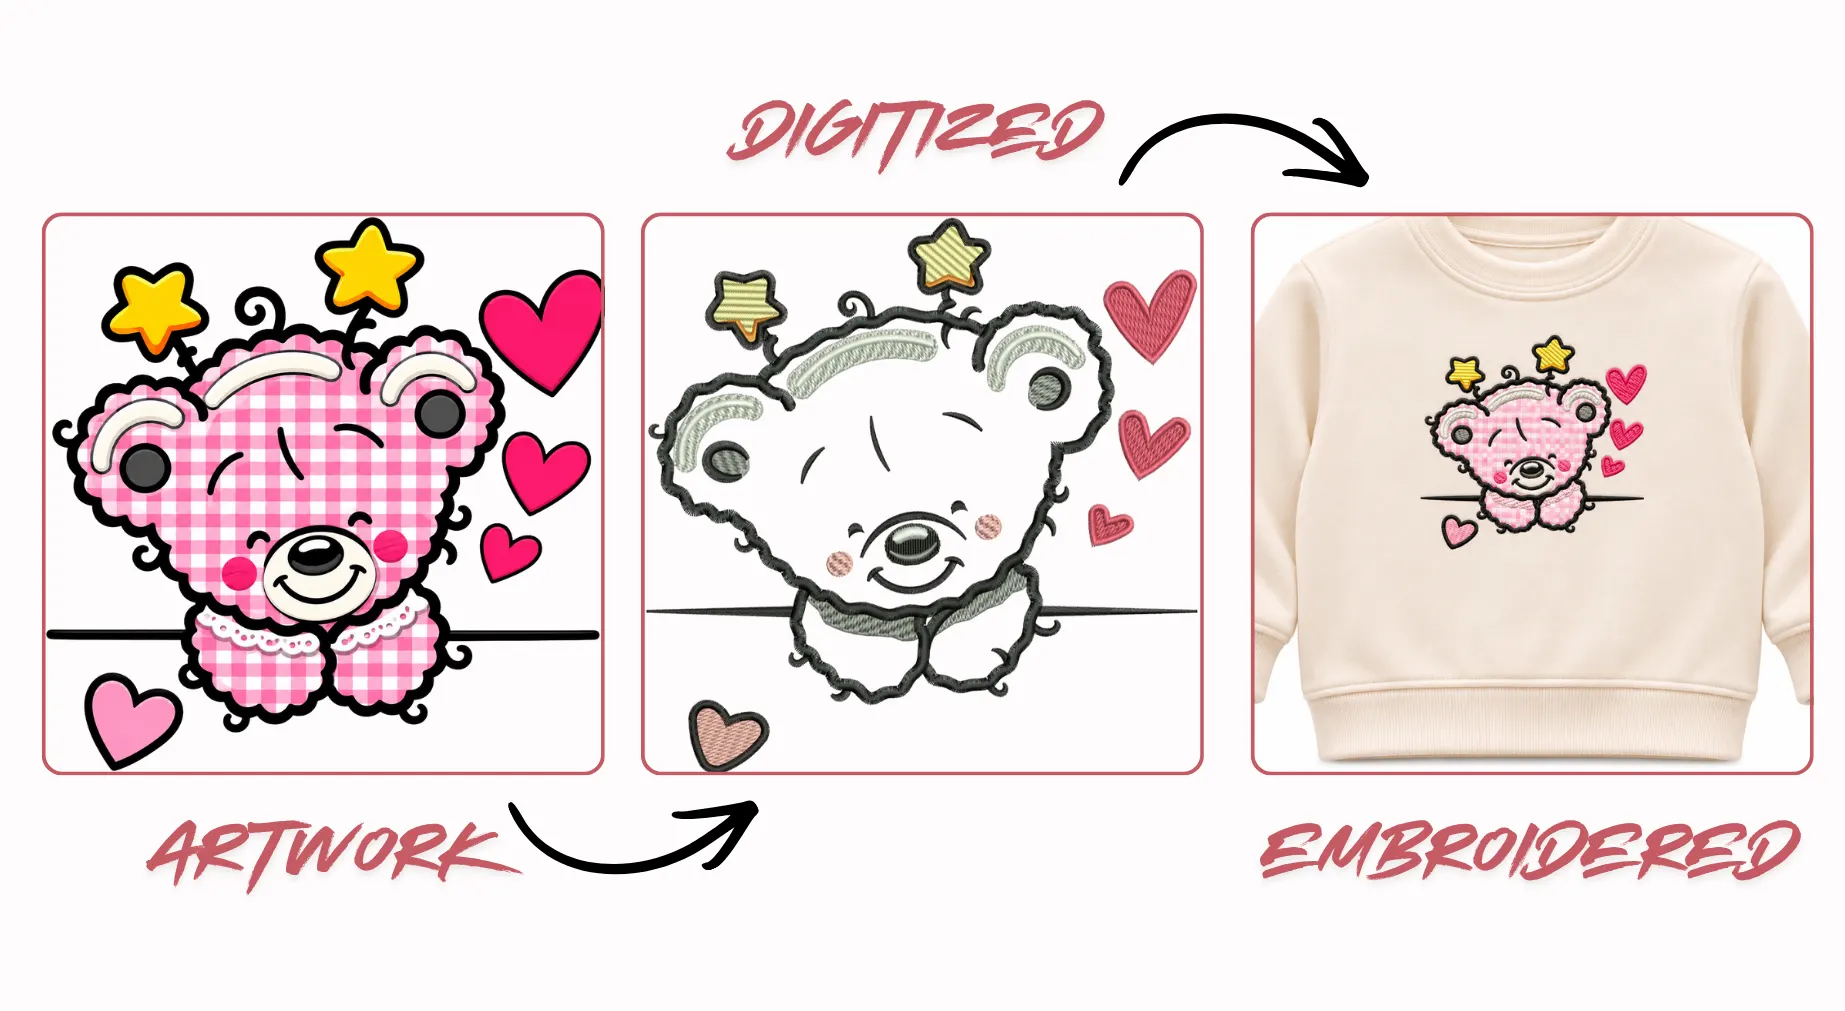
Appliqué designs need more than a clean outline. Complex logos, layered fabric shapes, and detailed lettering require careful stitch planning. Even a small error in placement or tack-down stitches can affect the finished design.
Therefore, hiring an experienced embroidery digitizer is a smart choice for custom orders and bulk production. A skilled expert can plan the stitch sequence, fabric cutting lines, machine stops, and finishing borders for your project.
What to Send for Custom Appliqué Digitizing
To get an accurate, machine-ready file, share these details with your digitizer:
- Clear logo or artwork in JPG, PNG, or vector format.
- Final embroidery size and placement.
- Garment type and appliqué fabric.
- Pre-cut or trim-in-place preference.
- Machine model and required file format, such as DST or PES.
With the right details, your digitizer can prepare a file that matches your project. For custom appliqué projects, share your artwork with Digitizing Buddy and request a free quote for a carefully prepared, machine-ready embroidery file.
Final Thoughts
Clean appliqué embroidery starts with accurate digitizing and careful fabric preparation. The right stitch sequence, fabric, stabilizer, and finishing border all play a role in the final result. Whether you choose pre-cut or trim-in-place appliqué, always test your design before stitching the finished garment.
Also, remember that more stitches do not always mean better quality. Proper settings and machine setup prevent common problems like puckering, shifting fabric, and uneven borders.
For complex designs, working with skilled digitizers saves time and reduces costly mistakes.
Ready to turn your Artwork or lettering into an appliqué design? Send your artwork to Digitizing Buddy and get a free quote for a custom, machine-ready embroidery file.
Frequently Asked Questions
Most embroidery machines can sew appliqué if the design fits the hoop and uses a compatible file format. The machine must also support the required pauses for fabric placement and trimming.
Yes. An appliqué design needs placement stitches, tack-down stitches, finishing stitches, and planned machine stops. A regular embroidery file may not include these instructions.
Yes, but resizing may affect stitch density, border coverage, and fabric placement. For major size changes, adjust the original digitizing file and test the new design before stitching.
Not always. PES and DST files contain embroidery instructions, while SVG files provide cutting outlines for compatible fabric cutters. Ask your digitizer for a separate cutting template when needed.
No. You can cut fabric with scissors for trim-in-place designs. However, a fabric cutting machine is useful for preparing matching pieces for repeated letters, logos, and bulk orders.