
| Quick Summary |
|---|
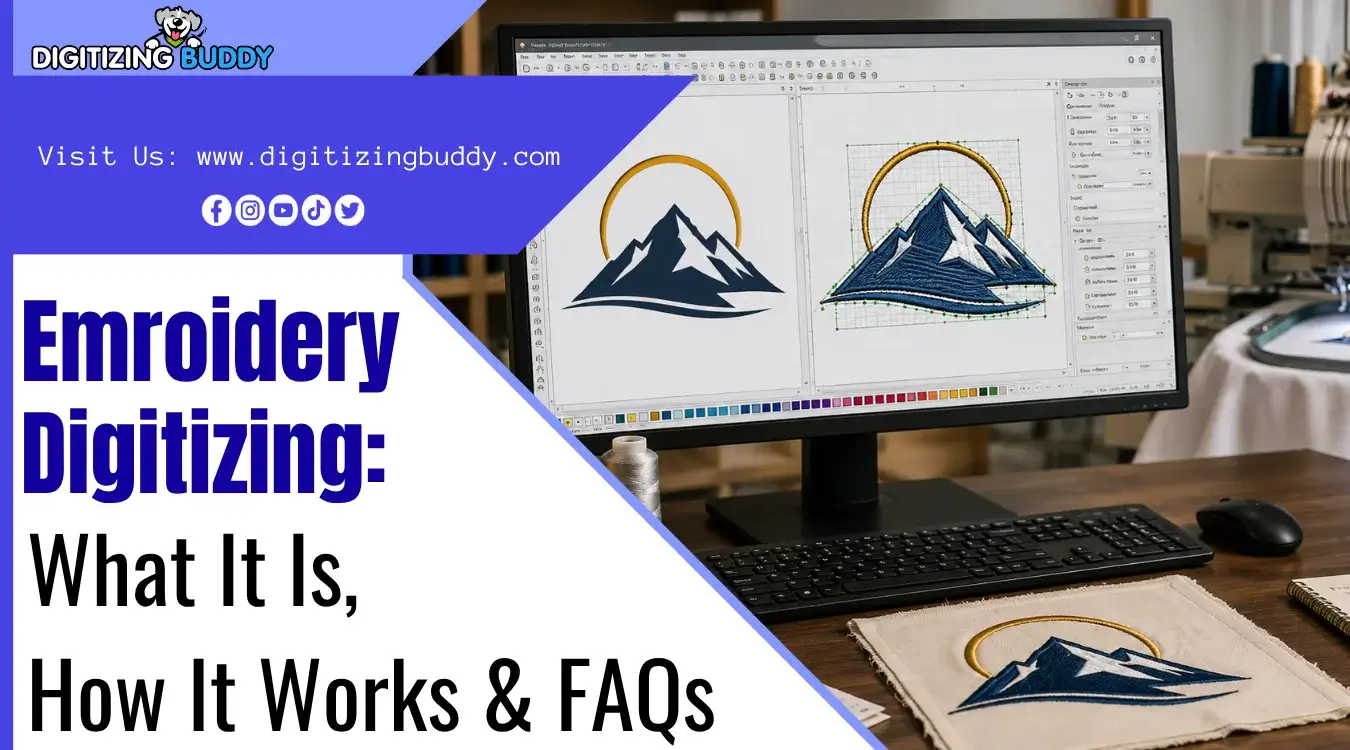
Digitizing prepares artwork as stitch instructions that an embroidery machine can read and sew.
|
You may have a JPG, PNG, logo, or drawing that looks perfect on screen, but an embroidery machine cannot stitch that artwork as it is. The image does not contain instructions for stitch placement, direction, density, or sewing order.
However, embroidery digitizing does more than change one file format into another. A digitizer must decide how each part of the artwork should stitch, how the design should move across the fabric, and how the final file should behave during production.
For this reason, good digitizing takes planning and embroidery knowledge.
If you prefer expert help, Digitizing Buddy provides quality digitizing services for embroidery to ensure clean, machine-ready stitch files.
- Quick Answer: What Does Digitizing Mean for Machine Embroidery?
- What Is Needed to Digitize for Embroidery?
- How Can You Digitize an Image for Embroidery?
- What Software Can You Use to Digitize Embroidery Designs?
- How to Digitize an Embroidery Design Step by Step
- Can Auto Digitizing Do the Whole Job?
- How Hard Is It to Digitize for Embroidery?
- What Problems Do Beginners Face When Digitizing Embroidery?
- Can You Digitize Embroidery for Free?
Quick Answer: What Does Digitizing Mean for Machine Embroidery?
Digitizing turns artwork into stitch instructions an embroidery machine can follow. It controls how each part of the design will sew, including stitch type, direction, order, density, underlay, and other settings.
Main Steps
- Prepare and simplify the artwork
- Build stitch objects
- Plan stitch order and direction
- Set fabric-aware stitch settings
- Export the machine file
- Test sew and refine
What Is Needed to Digitize for Embroidery?
You need more than an image to create a stitch-ready design. Start with clear artwork and software that lets you build and edit stitch objects. Common source files include JPG, PNG, PDF, SVG, AI, and other readable artwork formats.
Artwork and Software
- Clear, readable artwork
- Full digitizing software
- Final design size
Vector artwork can make clean shapes easier to trace and edit. However, it is not required. A clear JPG, PNG, or other readable image can also serve as the source for creating stitch instructions.
Production Details
Also confirm the garment or fabric, design placement, and the embroidery file formats your machine supports. These details help guide stitch planning and final export.
How Can You Digitize an Image for Embroidery?
An image such as a JPG or PNG shows what the design should look like, but it does not tell the machine where or how to stitch. The artwork only acts as a visual guide.
To create a stitch ready file, the digitizer builds separate design objects and assigns embroidery stitch types, direction, density, pathing, and sewing order. These choices control how the design forms on fabric and how smoothly the machine runs.
Therefore, you cannot simply rename or convert an image file. The artwork must be translated into planned stitch instructions before you export the final machine file.
Watch this short video to see how an image is prepared into stitch instructions for machine embroidery.
What Software Can You Use to Digitize Embroidery Designs?

Digitizing software helps you build stitch objects, choose stitch types, control direction and sequence, adjust underlay and density, preview the design, and export a file your machine can read.
Hatch Embroidery Digitizer 4
This option suits beginners, home embroiderers, and small businesses. It offers manual and automatic tools for creating and editing stitch designs.
Wilcom EmbroideryStudio 2026
This production focused software offers advanced tools for professional digitizers and commercial embroidery work. It supports designing, refining, editing, and preparing files for production.
Ink Stitch
This free, open-source option works with Inkscape and supports creating stitch paths and exporting machine files.
Other Software Options
Also consider machine specific programs based on:
- Supported file formats
- Operating system
- Budget
- Editing tools
- Level of stitch control
However, advanced software alone cannot guarantee a clean sew out. Good results still require knowledge of stitch types, sequencing, fabric behavior, underlay, density, and testing.
How to Digitize an Embroidery Design Step by Step
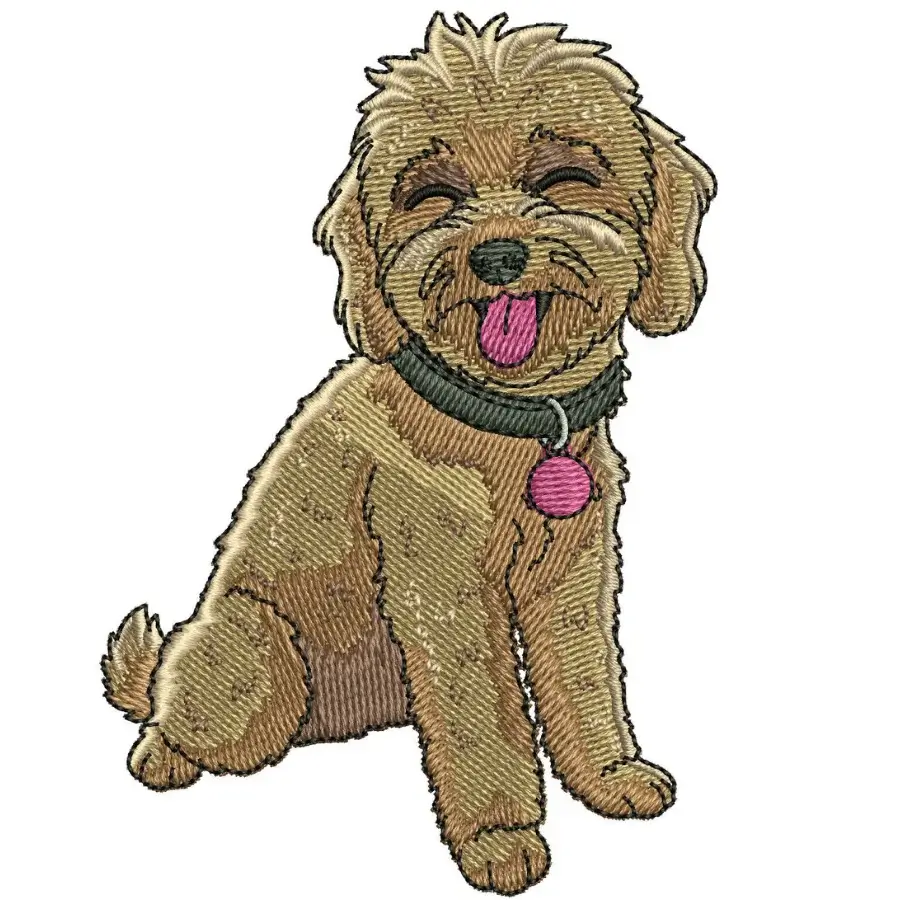
A clean stitch file starts with planning. Each choice should support the artwork, fabric, size, and final use. The goal is to build a design that runs smoothly and holds its shape.
Step 1: Review and Simplify the Artwork
Study the artwork before creating stitches. Separate the main shapes, borders, text, small details, overlapping areas, and any background that should be removed.
Also, check what will stay clear at the final size. Fine lines, tiny gaps, or small details may need simplification because thread cannot reproduce every detail shown on a screen.
Step 2: Set the Final Size and Fabric
Set the width and height before building the stitch plan. Also, confirm the hoop or embroidery field, placement, fabric type, stabilizer, and whether the design will stitch on a flat item or another application.
These factors affect how fabric moves during stitching. Therefore, resizing a finished design later can change how density, underlay, spacing, and compensation behave.
Step 3: Import the Artwork and Build Stitch Objects
Bring the artwork into your software and use it as a visual guide. Trace, draw, or define each area that needs stitches.
Think in separate objects rather than pixels. For example, lettering, borders, fills, and small details may need different stitch settings and sewing paths.
Step 4: Choose the Right Stitch Type
Choose a stitch type based on the shape, width, size, and purpose of each design object. Different parts of the same design often need different stitches.
| Stitch Type | Common Use |
|---|---|
| Running stitch | Thin lines, outlines, and fine details |
| Satin stitch | Lettering, borders, and narrow shapes |
| Fill stitch | Larger solid areas |
However, these are general uses rather than fixed rules. The final size, fabric, shape, and level of detail can affect which stitch type works best.
Step 5: Plan Direction Order and Pathing
Decide how the design will travel from one object to another. Check which object should sew first, which areas need to sit on top, and where each object should start and finish.
Use hidden travel stitches when practical, and reduce unnecessary jumps and trims. Also choose stitch directions that support the shape. Good pathing can reduce extra machine movement.
Step 6: Set Underlay Density and Pull Compensation
Underlay stitches create support beneath the top stitches. Density of stitches controls how closely they sit together. Pull compensation adds extra width where stitching may pull a shape inward.
However, no single setting works for every design. Fabric, thread, stitch type, object size, underlay, and other production factors affect the right values.
Step 7: Check Start, Stop, Jumps, Trims, and Color Order
Review the design before export. Look for:
- Poor start or end points
- Unnecessary jumps and trims
- Inefficient color changes
- Crowded short stitches
- Hidden travel paths
- Excessive overlapping stitches
The aim is a logical sewing sequence that avoids needless machine movement.
Step 8: Preview, Export, Test Sew, and Correct
Preview the stitch sequence and save an editable master file before exporting the machine compatible version. Keeping the editable file makes later changes easier.
Then run a test sew on the intended fabric or a close match with similar stabilizer. Check registration, coverage, edges, lettering, fabric distortion, and overall appearance.
Finally, correct the file based on the real stitch out. Testing is part of building a production ready design, not an optional extra.
Need a design that is ready for real production? Digitizing Buddy can prepare your artwork with the stitch planning, pathing, and file setup needed for a smoother sew-out.
Can Auto Digitizing Do the Whole Job?
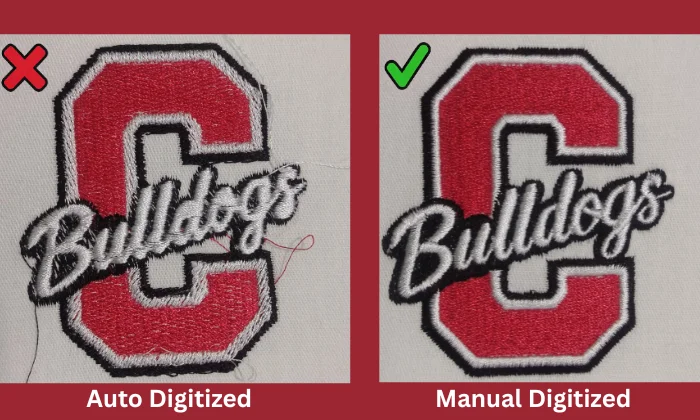
Auto digitizing tools can speed up the early stages of creating a stitch file. They can analyze artwork, recognize shapes, choose stitch types, set stitch directions, and generate an initial design.
What Still Needs Attention
However, automatic results still need a careful review. Check:
- Stitch sequence and object order
- Stitch angles and pathing
- Unnecessary jumps and trims
- Underlay, density, and pull compensation
- Fabric and final design size
Automation can create stitches, but it cannot guarantee a production ready result. Always review the settings and run a test sew before using the file for final embroidery.
How Hard Is It to Digitize for Embroidery?
The difficulty depends on the design and the final use. Simple shapes, basic fills, and larger lettering are easier for beginners to practice.
However, small text, detailed logos, textured fabrics, layered designs, special stitch effects, and tight registration need more skill. Learning the software controls can happen fairly, but production judgment takes more practice.
That judgment helps you choose better stitch types, pathing, density, underlay, and compensation for real fabric.
What Problems Do Beginners Face When Digitizing Embroidery?
A design can look clean on screen but behave very differently on fabric. Public discussions show gaps, shifting outlines, messy lettering, high stitch counts, and poor sew outs cause repeated confusion. The key is to find the real cause before changing settings.
Why Are There Gaps or Fabric Showing Between My Stitches?
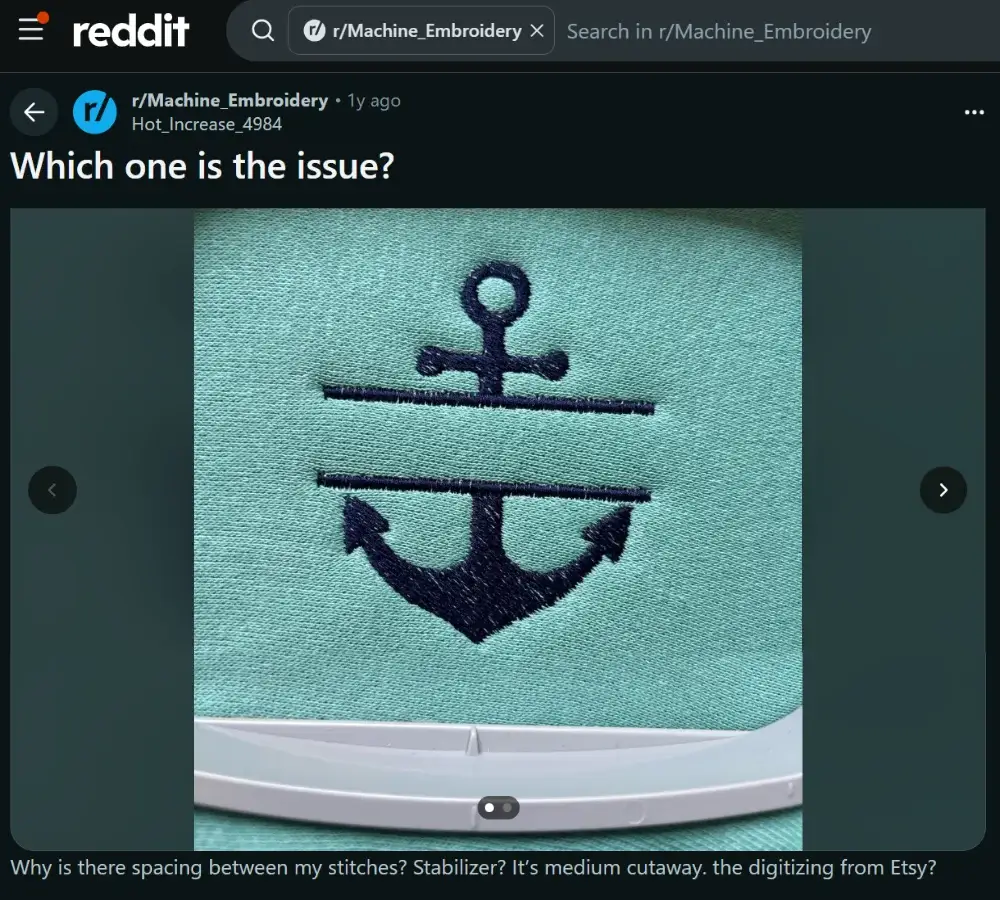
Visible fabric does not always mean the design needs more density. Stitch direction, underlay, pull compensation, fabric stretch, stabilizer, and hooping can all affect coverage.
Changing the fill angle can help stitches cross the fabric structure more effectively, while better stabilization can reduce movement during sewing.
Therefore, do not increase density automatically. Check the stitch structure, fabric, and setup together.
Why Do My Outline and Fill Stitches Not Line Up?
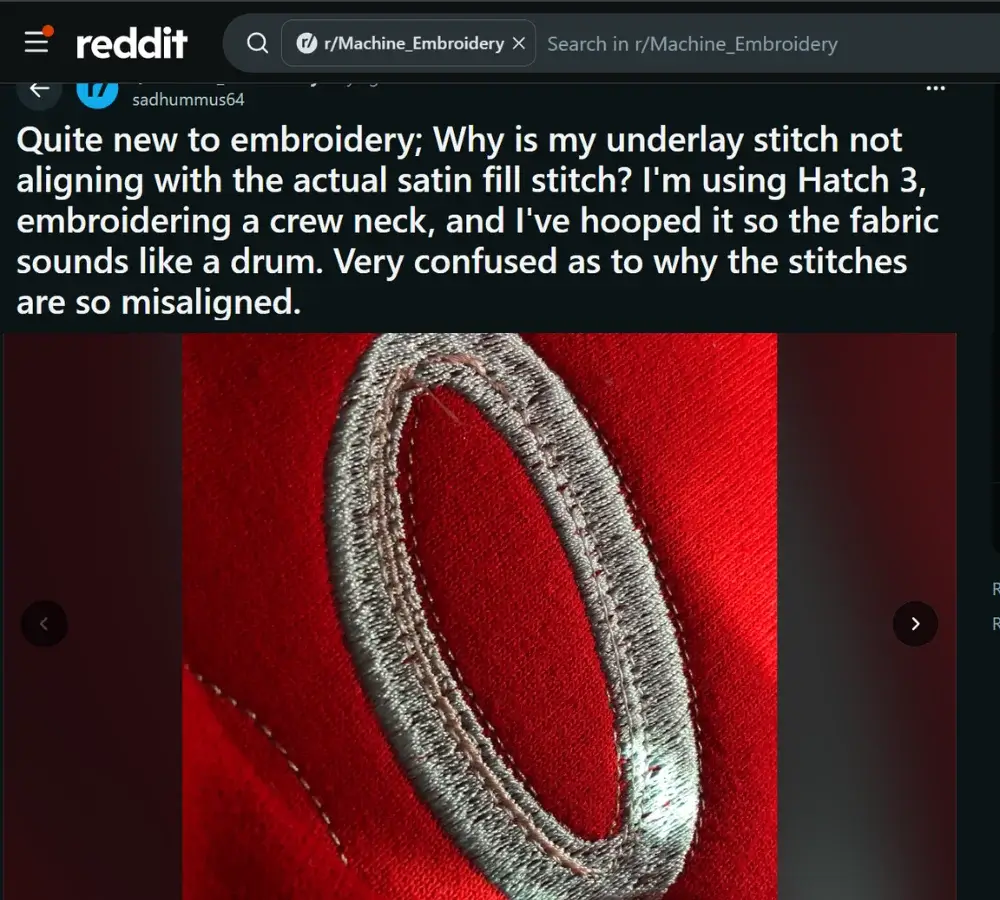
A border can match the fill perfectly in software and still shift during stitching. This often happens when the fabric moves or the stitched area pulls inward.
Pull compensation, underlay, stitch order, hooping, stabilizer, and heavy density can all affect registration. Sewing fills before distant outlines can allow movement to build.
For this reason, judge alignment from a real test sew, not only from the screen preview.
Why Does Small Embroidered Lettering Look Messy?
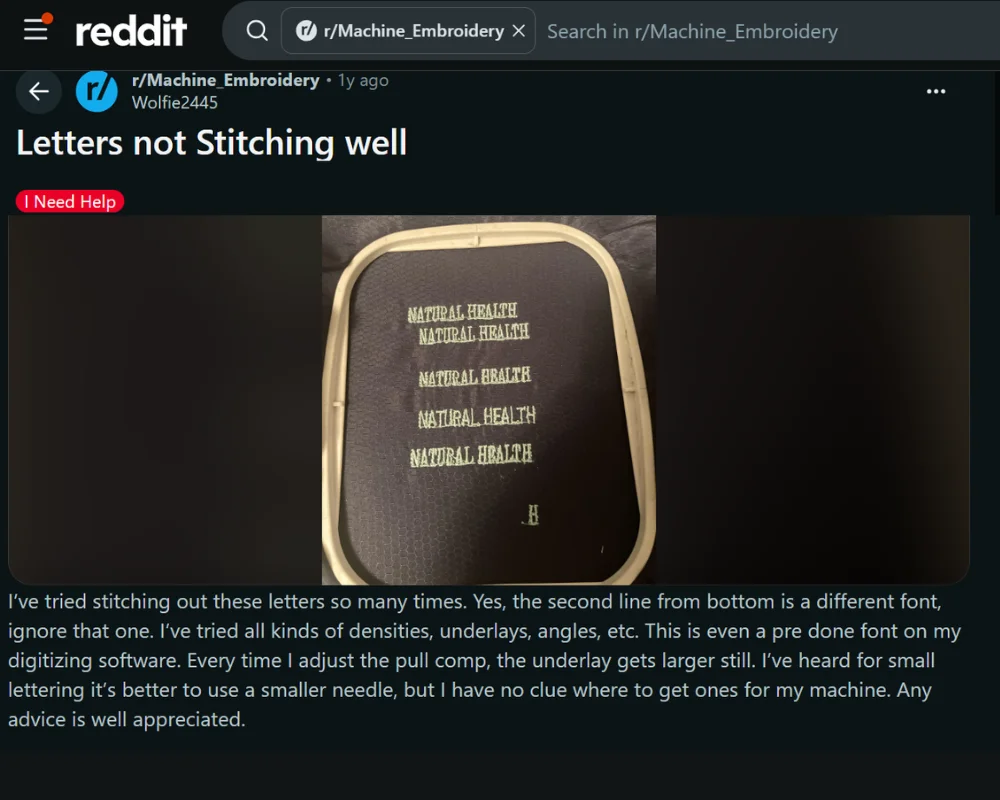
Small text digitizing is difficult because each letter has little space for stitches. Narrow columns can close up, curves can lose shape, and dense stitching can make letters look crowded.
Letter size, stitch type, density, underlay, compensation, thread weight, needle choice, and fabric all affect readability.
Instead of simply shrinking larger lettering, build or adjust the text for its actual finished size.
Why Does My Digitized Design Have So Many Stitches?
A high stitch count is another common concern. However, more stitches do not always mean higher quality. Public discussions also show users trying to reduce stitch counts without hurting coverage or quality.
Unnecessary overlaps, duplicate objects, excessive density, repeated stitching, poor pathing, and inefficient object construction can increase the count. Resizing without recalculating the stitch structure can also create problems.
Review the sequence and object construction before removing stitches at random. The goal is efficient coverage, not the lowest possible number.
Why Does Auto Digitizing Look Good on Screen but Stitch Poorly?
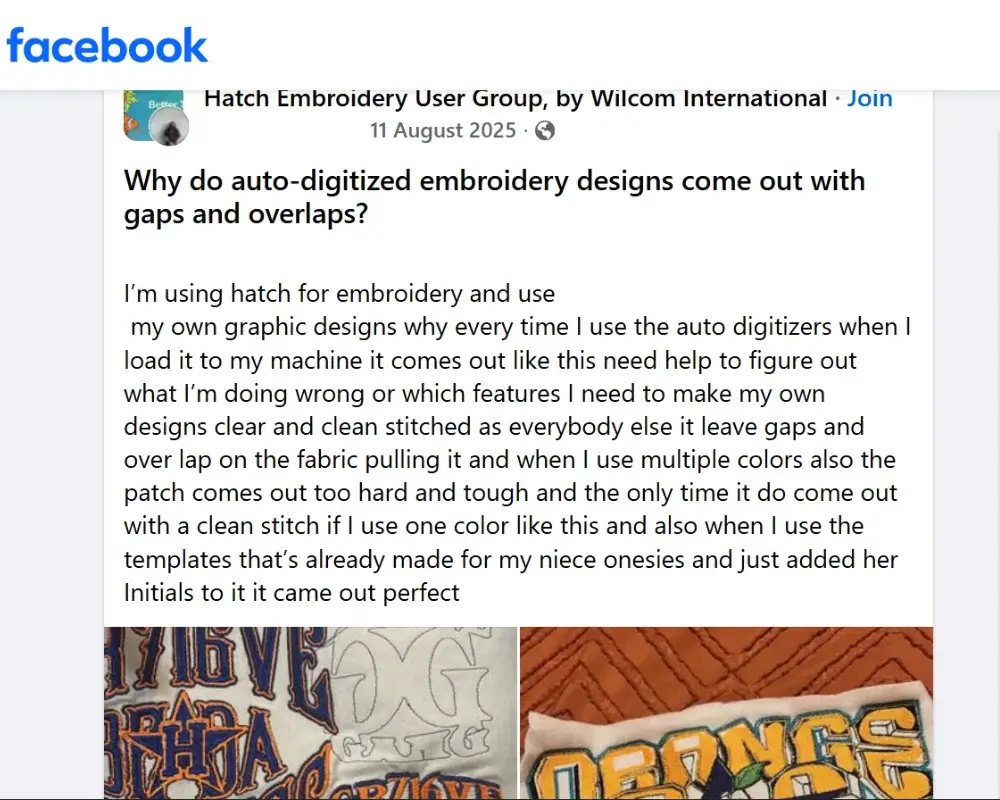
Automatic tools can produce a convincing preview, yet the sew out may reveal gaps, heavy areas, poor sequencing, extra trims, or weak details.
The preview cannot fully show how thread, fabric, stabilization, and machine movement will interact. Automatic results may still need changes to stitch direction, density, layering, pathing, and pull compensation.
Therefore, treat the automatic result as a starting point, then manually adjust and verify it with a test sew.
Is It a Digitizing Problem or a Machine Setup Problem?
This question appears often because the symptoms can overlap. Poor coverage or shifting may come from the stitch file, but tension, needle condition, thread, backing, hooping, or fabric can create similar problems.
Before making random edits, check:
- Test fabric and stabilizer
- Correct hooping
- Needle and thread condition
- Machine tension
- Stitch sequence and design settings
A controlled test helps separate file problems from setup problems and makes corrections easier.
Can You Digitize Embroidery for Free?
Yes, you can create stitch designs without paying for software. Ink/Stitch is a free, open-source platform that works with Inkscape and provides tools for stitch paths, lettering, fills, routing, and machine-ready output files.
However, free software only removes the purchase cost. You still need to understand stitch direction, sequence, density, underlay, fabric behavior, and testing to create a reliable sew out.
For more options, read Digitizing Buddy’s guide to free software for creating embroidery files and compare tools before choosing one.
Should You Digitize Your Own Design or Use a Professional Service?
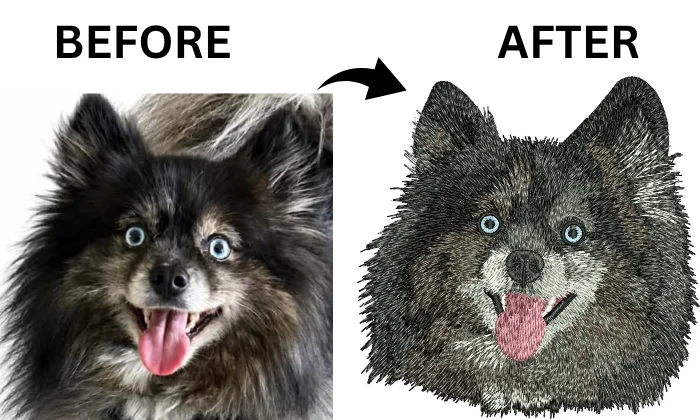
Doing it yourself can make sense if you want to build the skill and have time to practice. However, good results require suitable software, repeated testing, and a learning curve that can take time away from production.
DIY Works Best When
- Designs are simple
- You want hands-on practice
- You can run several test sew-outs
Professional Help Makes Sense When
- The file is for a customer order
- Small lettering or fine detail matters
- Specialty garments need careful planning
- Deadlines are tight
Meanwhile, outsourcing can free you to focus on stitching, customer orders, and other productive work. It may also cost less than repeated failed samples, machine stops, and wasted materials.
Final Thoughts
Creating a clean stitch file takes more than converting artwork into another format. Good results depend on clear artwork, the right software, smart stitch choices, proper pathing, fabric-aware settings, and a real test sew.
Beginners can start with simple designs and build their skills over time. However, detailed logos, small lettering, and production work often need more experience.
When you need dependable files without slowing down your workflow, send your artwork to Digitizing Buddy and get a free quote.
FAQs
No. Vector artwork can make clean shapes easier to trace, but it is not required. A clear JPG, PNG, PDF, or other readable image can also be used as the source for building stitch instructions.
No. A JPG contains image information, while DST contains stitch commands for an embroidery machine. The artwork must be prepared as stitch objects with the correct stitch types, sequence, direction, and other settings before exporting it as a DST file.
Not necessarily. You can learn software tools and practice creating stitch files without owning a machine. However, access to a machine is valuable because a real sew out shows how the design reacts to fabric, thread, stabilizer, and machine settings.
Not always. Automatic tools can create a useful starting point, especially with simple artwork. However, you should still review stitch direction, density, underlay, sequencing, pathing, jumps, and trims. A test sew helps confirm whether the file is ready for production.
Yes, especially for customer orders or production work. A test sew can reveal issues with coverage, registration, density, small lettering, fabric movement, or stitch pathing that may not appear in the software preview. Testing gives you a chance to correct the file before stitching the final item.