
This guide explains how to create a proper vector file for DTG printing so your artwork prints clean and sharp on fabric. It covers what a vector file is, which software and file formats work best, how to set up artwork step by step, and why professional vector artwork services can help you get better print results.
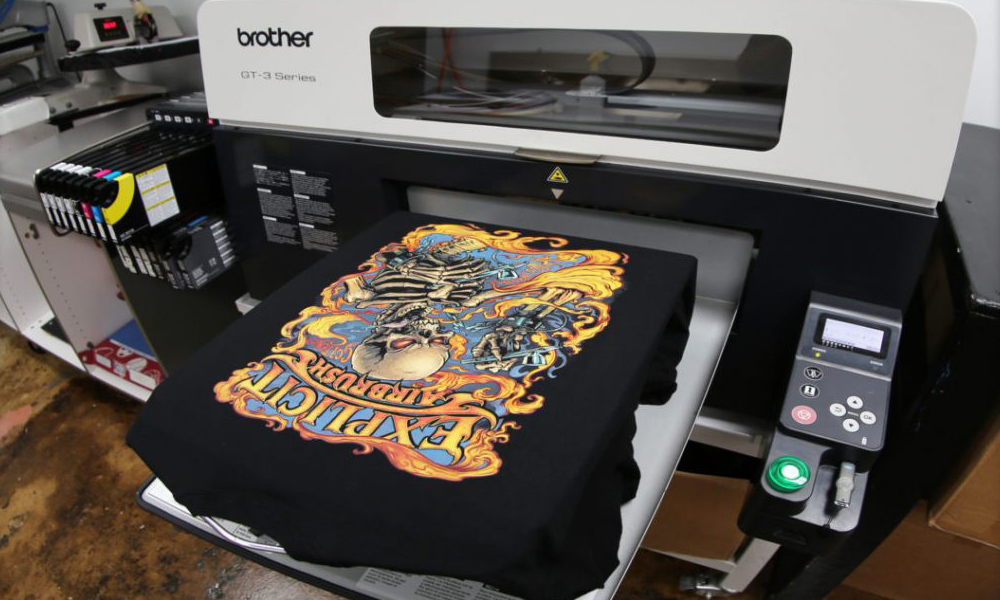
DTG (Direct-to-Garment) printing brings your artwork to life directly on fabric, but the quality of your print always depends on the quality of your design file. A pixelated or blurry image can ruin even the most advanced printer’s output. That is why creating a clean, scalable vector file is the first and most important step before sending your design for DTG printing. In this guide, you will learn exactly how to make a perfect vector file step by step, which formats work best, and which software professionals use. You will also discover why hiring expert vector artwork services can save you hours of frustration and deliver flawless print results every time.
What Is a Vector File?
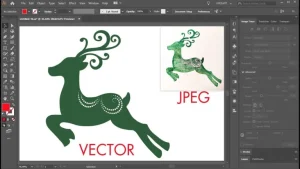
A vector file is a digital artwork made from mathematical shapes and lines instead of pixels. It is the backbone of every professional printing process, including DTG (Direct-to-Garment) printing. Unlike ordinary image files such as JPG or PNG, a vector file can be resized, recolored, or edited without ever losing clarity. Let’s break down what makes a vector file special and why it is so important for printing.
1. Built from Mathematical Paths
Vector files are made up of paths, which are lines and curves defined by mathematical equations. Each path has control points that determine its shape, angle, and smoothness. Because the image is built from math instead of tiny dots, every curve and line stays perfectly sharp. This precision is what makes vectors the go-to format for professional logos, illustrations, and printing artwork.
2. Infinitely Scalable
One of the biggest advantages of vector graphics is infinite scalability. You can enlarge a vector image from the size of a business card to the size of a building banner and it will always look crystal clear. There is no pixelation or blurriness because the computer recalculates the paths to keep them smooth at any size. This feature is vital for DTG printing, where artwork must look equally good on a small chest print and a large back design.
3. Fully Editable Elements
Every component of a vector file, colors, outlines, shapes, and text, can be edited independently. You can easily change a shirt color, adjust line thickness, or update a logo font without starting from scratch. This flexibility saves time and ensures brand consistency across multiple designs and print types.
4. Lightweight and Easy to Share
Even though vector files contain complex artwork, they are surprisingly small in size compared to high-resolution raster images. This makes them easier to email, upload, or store. Because the data describes shapes instead of thousands of pixels, the file remains compact and quick to open in professional software.
5. Perfect, Crisp Edges for Printing
Vectors always produce clean, razor-sharp edges. This is especially important in DTG printing because the printer uses these edges to define where the ink is laid down. When the design has perfect outlines, the printed result looks smoother, colors stay accurate, and there are no unwanted fuzzy borders. Clean edges also make it easier to create the white under base that DTG printers use beneath the color layer for brightness.
| Aspect | Vector | Rester |
|---|---|---|
| Composition | Paths & nodes | Pixels |
| Scalability | Infinite, no loss | Loses quality when enlarged |
| Editability | High (colors/paths) | Limited (needs rework) |
| DTG Prep | Ideal for master file | Final print often needs high-res PNG/TIFF |
Why Vector Matters for DTG Printing
1. Crisp Edges for Sharper Prints
Vector files have perfectly smooth outlines that help DTG printers produce clean and sharp details. When the design edges are precise, the print looks more professional and defined. It also helps create a cleaner white under base, which is the foundation layer that makes colors appear brighter and more vibrant on the garment.
2. Clean Color Areas for Better Printing Results
A properly made vector file has clearly defined color regions. This helps the printer’s RIP software understand how to apply ink correctly. As a result, the printer lays down colors more smoothly and accurately, without random spots or uneven patches.
3. Easy Edits for Different Garments
Vector artwork can be resized or recolored instantly without losing quality. Whether you need the same design for a small chest print or a large hoodie back, the file stays perfect. This flexibility also allows quick color adjustments for light or dark fabrics.
4. Consistent Branding Across All Products
Using vector artwork keeps your brand colors, shapes, and text consistent on every product. No matter the size or printing surface, the design always looks identical, giving your products a professional and uniform appearance.
5. Less Pre-Press Work and Faster Printing
Since vector files are clean and organized, they require less setup time before printing. The print shop can go straight to production without multiple revisions or corrections. This saves time, reduces errors, and ensures your DTG prints are ready much faster.
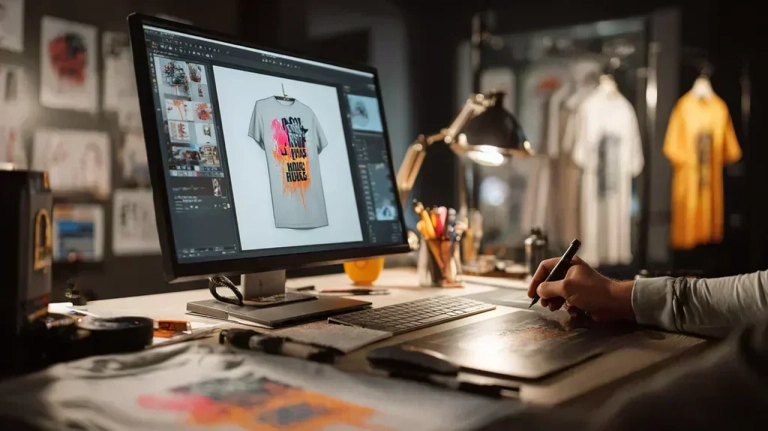
Which Software to Use for Creating Vector Files
There are several software programs used by professionals to create vector artwork for DTG printing. Each tool has its own strengths, but they all serve the same purpose,to produce clean, editable, and scalable vector designs that print perfectly on fabric. Whether you are working with simple logos or detailed illustrations, choosing the right software can make a big difference in quality and workflow.
Professional designers can deliver your artwork in any preferred format such as AI, EPS, or PDF, regardless of which software they use. This means that even if you do not own the same program, you can still receive files that are fully compatible with your printer or print shop.
Below is a quick comparison of the most popular software used for vector artwork creation, specifically focused on DTG printing.
| Software | OS | Pricing Model | Strengths for DTG | Learning Curve |
|---|---|---|---|---|
| Adobe Illustrator | Windows / Mac | Subscription | Industry standard with the best path tools and color management | Moderate |
| CorelDRAW | Windows / Mac | One-time or Subscription | Popular in print houses with excellent curve handling | Moderate |
| Affinity Designer | Windows / Mac / iPad | One-time | Fast, affordable, and exports clean SVG or PDF files | Easy to Moderate |
| Inkscape (Free) | Windows / Mac / Linux | Free | Great for beginners, supports SVG and PDF formats | Moderate |
Which Vector Formats Are Used and When
Different printing methods and software require specific vector formats. Choosing the right file type ensures that your artwork looks sharp, prints accurately, and stays editable for future use. In DTG printing, vector files are typically created in professional design software and then exported to the format your printer or RIP software prefers.
Vector formats serve as master design files, allowing easy resizing, recoloring, and editing. They are also used to create the final raster print files such as PNG or TIFF, which are what most DTG printers actually print from.
Here are the most common vector formats and their uses:
| Format | Use Case | Notes |
|---|---|---|
| AI | Master or editable design file | Native format for Adobe Illustrator. Keeps layers, text, and paths fully editable. |
| EPS | Cross-software exchange format | Widely supported by printers and design programs. Preserves vector data accurately. |
| PDF (Vector) | Delivery or client proof | Easy to share and preview. Must be saved with “Preserve vector data” enabled. |
| SVG | Web use or small-scale printing | Lightweight and ideal for online platforms or simple DTG artwork. |
| CDR | CorelDRAW-based print workflows | Common in screen printing and signage industries, especially in Asia and Europe. |
Step-by-Step: How to Create a Proper Vector File for DTG Printing
Creating a high-quality vector file for DTG printing requires careful setup and precision at every stage. Follow these steps to ensure your design prints perfectly, with clean lines, accurate colors, and full compatibility with your printer’s RIP software.
1. Start a New Document
Begin by opening your preferred vector software and creating a new document at your final print size (for example, 12 inches wide for a T-shirt front). Set the color mode to RGB, as this is what most DTG printers use for accurate color display and brightness.
2. Import or Draw the Artwork
If you are working from a sketch, logo, or existing image, import it and redraw it using the Pen or Shape tools. This converts the artwork into clean vector paths. Avoid relying on auto-trace features, as they often create messy paths with too many anchor points. Manually refining the shapes gives smoother lines and sharper prints.
3. Clean and Refine the Paths
Check for stray points, overlapping shapes, and hidden objects that can interfere with printing. Simplify complex paths to make the file lighter and easier to process. If the artwork includes strokes or outlines, expand them to preserve thickness consistency when resizing.
4. Handle Text Carefully
Keep a version of your file with editable text for future changes, but convert fonts to outlines in the final version you send to the printer. This ensures your design displays correctly even if the print shop does not have your fonts installed.
5. Manage Colors Wisely
Use solid fills or smooth gradients that reproduce well on fabric. Avoid overprinting or using too many shades that could cause ink blending issues. Stick to a limited, consistent palette that maintains your brand’s identity.
6. Organize Layers and Groups
Arrange elements in logical layers such as background, main design, and text. Name each layer clearly so anyone who opens the file can understand it easily. This also helps when adjusting the design for different garment types or colors.
7. Maintain Transparency
Ensure that your artwork has a transparent background. Remove any white rectangles or hidden fills behind your design. Transparency is crucial for the DTG printer to correctly apply the white under base only where it is needed.
8. Check Edge Quality
Zoom in between 800% and 1600% to check for jagged lines, rough curves, or small gaps. Every edge should look smooth and connected for precise ink placement during printing.
9. Export for DTG Printing
Once the artwork is ready, export it as a PNG or TIFF with a transparent background at 300 to 400 DPI in RGB mode. These formats are compatible with most DTG printers. Additionally, provide a vector PDF or EPS if the print shop requests it for reference or editing.
10. Professional Tip
Hiring a professional vector artwork service can save time and ensure accuracy. Experienced designers provide clean paths, outlined text, and perfectly sized PNG or TIFF exports tailored to your garment color. This reduces misprints, improves print sharpness, and minimizes rework.
When and Why to Hire Professional Vector Artwork Services
Save Time and Focus on What Matters
Hiring a professional vector artwork service saves you precious time and energy. Instead of spending hours redrawing or fixing artwork, you can focus on more important parts of your business such as sales, customer service, and marketing. Professionals handle the technical side quickly and efficiently, giving you clean, ready-to-print files without stress.
Cost-Effective and Consistent Quality
Professional services are surprisingly affordable compared to the time and effort it takes to do it yourself. Companies like Digitizing Buddy offer vector artwork services starting at just $10. You get perfectly redrawn files with brand colors locked in and formats like AI, EPS, PDF, PNG, and TIFF included. This ensures consistent quality across all your print projects.
Print-Ready Perfection
Experts know how to prepare designs with transparent backgrounds, correct sizing, and proper under base handling for DTG printing. They also manage complex graphics such as fine lines, gradients, and distressed textures with accuracy, ensuring your final prints look clean and professional.
Conclusion
Ready to get your artwork print-ready? get your instant Free Quote today. We will deliver clean, professional vector files, all prepared for perfect DTG printing. Enjoy a quick turnaround, unlimited minor edits, and reliable results every time. Hire Digitizing Buddy for a smooth, stress-free vector artwork experience and sharper prints that truly stand out.
FAQ’s
Why are vector files important for DTG printing?
Vector files help maintain sharp outlines and consistent color areas. This makes it easier for the DTG printer’s RIP software to process the artwork correctly and produce smoother prints with better detail and color accuracy.
Which vector formats are used for DTG printing?
The most common vector formats include AI, EPS, PDF, and SVG. These formats store scalable artwork that can be edited easily. For final DTG printing, the vector design is usually exported as a high-resolution PNG or TIFF file with a transparent background.
Can DTG printers print directly from vector files?
Most DTG printers do not print directly from vector formats like AI or EPS. Instead, the vector design is exported into a print-ready PNG or TIFF file that the printer’s RIP software uses to control the ink output on fabric.
What software is used to create vector artwork?
Professional designers commonly use Adobe Illustrator, CorelDRAW, Affinity Designer, and Inkscape. These programs allow designers to create clean paths, smooth curves, and scalable artwork suitable for high-quality printing.
Can I convert a JPG or PNG into a vector file?
Yes, but the best results usually come from manual vector tracing rather than automatic conversion. Auto-trace tools often create messy paths and uneven edges, while manual vector redraw produces cleaner lines and better printing results.
What resolution should DTG artwork be exported at?
When exporting the final file for DTG printing, the design should usually be 300 to 400 DPI in RGB color mode. This ensures sharp detail and accurate color reproduction on the garment.
Should text be converted to outlines in a vector file?
Yes. Before sending a vector file to a printer, text should be converted to outlines or curves. This prevents font substitution problems if the print shop does not have the original font installed.
What size should artwork be for DTG printing?
The design should be created at the actual print size, such as a chest logo or full-front print area. Since vector artwork is scalable, it can be resized easily before exporting the final PNG or TIFF print file.
When should you hire a vector artwork service?
You should consider hiring a professional vector artwork service when your design is blurry, low-resolution, complex, or needed for commercial printing. Professionals can redraw artwork cleanly and deliver print-ready files quickly.