
When embroidery does not look right, most people blame the machine, the thread, or the stabilizer. They assume the tension is incorrect, the needle is unsuitable, or the operator made a mistake. While these factors can affect results, they are rarely the real cause of ongoing quality problems.
In many cases, the issue begins much earlier at the digitizing stage. More specifically, it starts with stitch density in embroidery digitizing. Density controls how closely stitches are placed together, and this single setting directly influences coverage, texture, flexibility, and even machine performance during production.
If stitch density is too high, the design becomes stiff, fabric may pucker, and thread breaks increase. If it is too low, gaps appear and the embroidery looks thin or incomplete. The correct balance must be calculated based on fabric type, design size, stitch type, and production goals. This is where professional embroidery digitizing services add real value. They do not guess density settings. They adjust and optimize them to ensure durability, smooth machine runs, and consistent quality.
When stitch density is incorrect, the entire result suffers regardless of how advanced the machine or thread may be.
- What Is Stitch Density in Embroidery Digitizing?
- Why Stitch Density Directly Impacts Quality
- Stitch Density Is Not One Size Fits All
- How Professional Embroidery Digitizing Services Optimize Density
- Why Hiring Professional Services Is Smart for Growing Businesses
- Real World Example: Left Chest Logo Comparison
- Final Thoughts: Density Determines Professionalism
What Is Stitch Density in Embroidery Digitizing?
Definition of Stitch Density
Stitch density in embroidery digitizing refers to the spacing between individual stitches in fill areas and satin columns. It determines how tightly the stitches are placed within a design. This spacing directly affects how solid, smooth, or lightweight the embroidery appears on the final garment.
How Stitch Density Is Measured
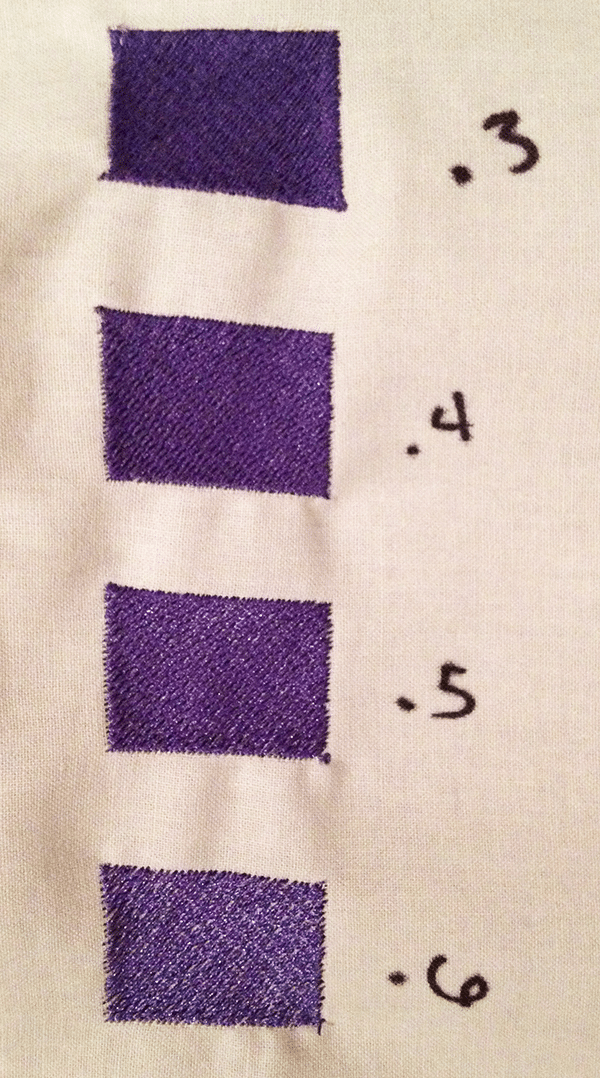
Stitch density is commonly measured in millimeters between stitch rows, although some systems may use stitches per inch. A smaller value such as 0.35 mm means stitches are placed closer together, creating heavier density. A larger value such as 0.45 mm means stitches are spaced farther apart, resulting in lighter density.
Understanding this measurement is important because even a small adjustment can significantly change the look and performance of the design.
Visual Comparison: 0.35 mm vs 0.45 mm
Imagine the same logo digitized twice with different density settings. In the first version, the fill is set to 0.35 mm. The coverage appears very solid and compact, and the design feels slightly heavier on the fabric. In the second version, the fill is set to 0.45 mm. The design looks softer, more flexible, and slightly lighter in coverage.
The artwork itself has not changed, but the texture, stiffness, and production behavior are noticeably different.
Stitch Density Is a Structural Decision
It is important to understand that stitch density is not a simple tool to make a design look darker or more filled. It is a structural decision that influences fabric stability, stitch count, machine speed, and long term durability.
When stitch density in embroidery digitizing is adjusted correctly, the design runs smoothly and maintains professional quality. When it is handled without proper calculation, it can create issues that affect the entire production process.
Why Stitch Density Directly Impacts Quality
Stitch density in embroidery digitizing does not just affect appearance. It influences how the fabric behaves, how the machine performs, and how profitable a job becomes. Small density miscalculations can create visible flaws and hidden production costs.
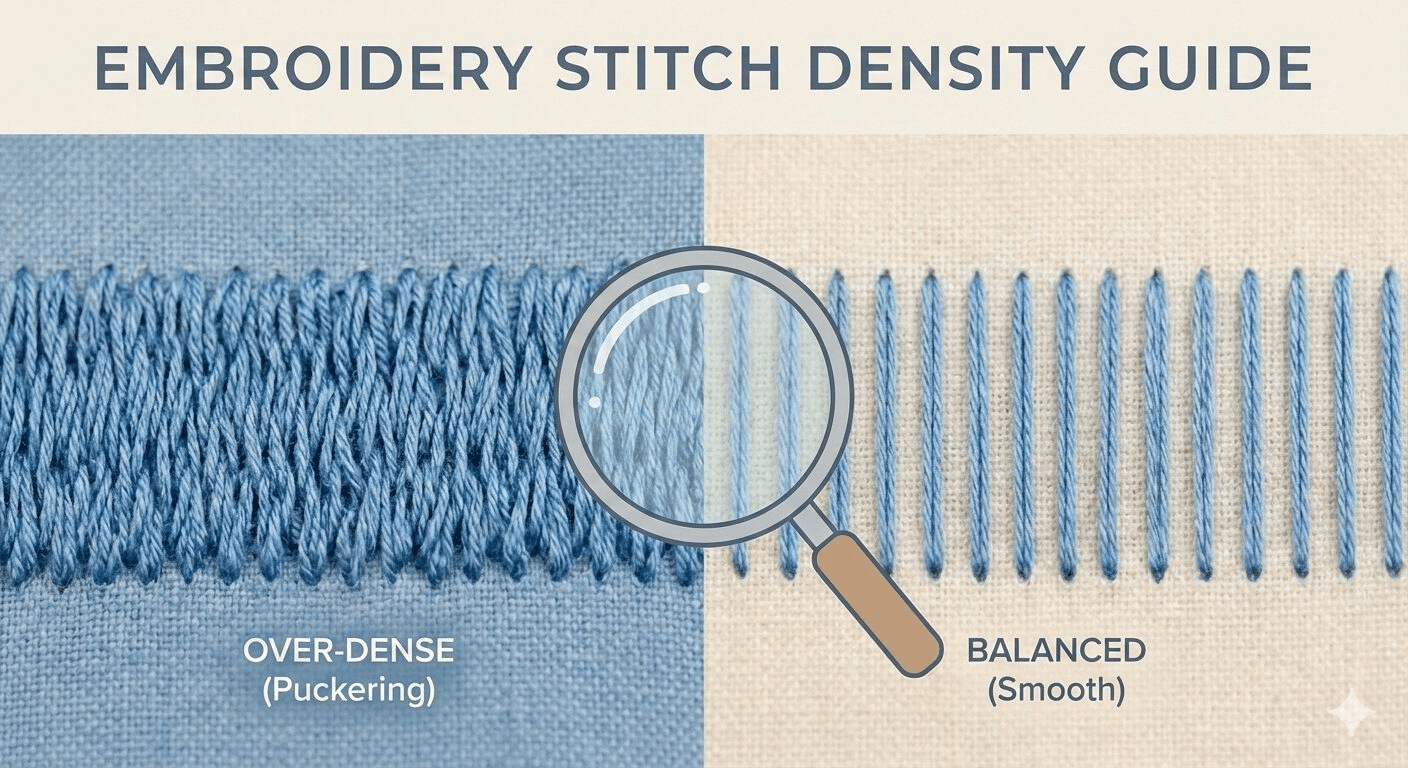
A. Fabric Distortion and Puckering
When stitch density is too high, stitches are packed too tightly into the fabric. This creates tension and causes the material to pull inward. The result is puckering, waviness, or a distorted logo that does not lay flat.
This problem is especially common on t-shirts, polos, and performance fabrics. These materials stretch easily, so excessive density can ruin the garment’s shape and make the embroidery feel stiff and uncomfortable.
B. Thread Breaks and Needle Damage
High stitch density increases friction between the needle, thread, and fabric. More stitches in a small area generate more heat during high speed production. Over time, this leads to thread breaks, needle wear, and even machine stress.
Frequent thread breaks slow production and require constant monitoring. For embroidery businesses running multiple heads or bulk orders, this directly reduces efficiency and increases downtime.
C. Poor Coverage and Visible Gaps
On the other hand, density that is too light creates a different type of problem. When stitches are spaced too far apart, the fabric shows through the design. This is especially noticeable on dark garments or large fill areas.
The embroidery may look thin, inconsistent, or poorly finished. Customers often interpret this as low quality work, even if the machine ran smoothly.
D. Production Efficiency and Cost Control
Higher stitch density means a higher stitch count. A higher stitch count means longer machine run time. Longer run time increases electricity use, labor time, and machine wear.
For business owners, this becomes a cost issue. Two files may look similar, but the one with optimized stitch density will run faster and reduce production expenses. This is the point where embroidery businesses begin to view stitch density not just as a technical setting, but as a profitability factor.

| Feature | Digitizer A (Heavy Density) | Digitizer B (Balanced Density) |
|---|---|---|
| Logo placement | Left chest | Left chest |
| Density approach | Heavy density to force coverage | Balanced density with proper planning |
| Stitch count | ~18,000 stitches | ~14,500 stitches |
| Machine run time | Longer | Faster |
| Thread breaks | More likely | Minimal |
| Fabric behavior | Higher risk of puckering and distortion | Lays flatter and cleaner |
| Finish quality | Acceptable but heavier feel | Cleaner edges, softer feel, more professional |
| Cost impact | Higher cost per piece due to time and stoppages | Lower cost per piece with smoother production |
| Best for | Short runs where quality issues are tolerated | Bulk production and consistent professional output |
Final Thoughts: Density Determines Professionalism
Stitch density in embroidery digitizing is one of the most important factors behind professional looking results. It affects how clean the design looks, how smoothly it runs on the machine, how durable it stays after wear and washing, and how much it costs to produce. When density is too heavy or too light, the problems show up in the form of thread breaks, puckering, gaps, stiffness, and wasted production time.
The right density is never chosen in isolation. It must be balanced with underlay strategy, fabric type, placement, and stitch structure. A setting that works on a jacket can fail on a polo. A cap file needs a different approach than a left chest logo. This is why density is a technical decision that requires practical production understanding.
Auto digitizing tools can help with speed, but they cannot consistently deliver production ready density settings without manual correction. Professional results come from controlled adjustments, proper compensation, and planning the design to run efficiently.
Businesses that invest in professional embroidery digitizing services gain long term consistency and efficiency. They reduce rework, protect garments, improve daily output, and deliver clean embroidery that keeps customers coming back.
Get your instant free quote at Digitizing Buddy today and ensure your embroidery file is optimized with the correct stitch density for smooth production.