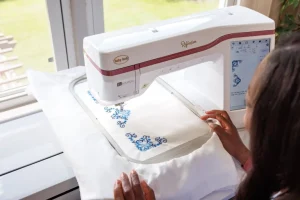
Embroidery has never been more fun or accessible, thanks to advanced machines like Babylock. Whether you are a hobbyist personalizing clothes at home or a small business owner creating branded apparel, Babylock machines make it possible to stitch beautiful designs with ease. But before your design can come to life on fabric, there is one critical step: converting your logo into an embroidery file such as PES or DST.
This conversion is not as simple as dropping your logo into software and pressing “convert.” Many beginners try it themselves and end up with messy stitches, broken threads, or distorted designs. That happens because embroidery machines need precise stitch data, not just an image.
This is where professional embroidery digitizing makes all the difference. A skilled digitizer creates clean, machine-readable files that ensure your Babylock embroidery machine stitches smoothly without errors or wasted materials.
In this blog, we will explain how logo conversion works, which file formats Babylock uses, and why hiring a professional digitizing service is the smartest choice for perfect embroidery results.
2.Why Convert Your Logo to Embroidery

What is Digitizing
When people talk about converting a logo to embroidery, they are referring to embroidery digitizing, a process where a flat image such as a JPG, PNG, or PDF is transformed into a file that contains exact stitch data. This data tells your Babylock embroidery machine how to move the needle, where to start, stop, and change thread colors.
File Formats used by Babylock Machines
Babylock embroidery machines use specific file types like PES, PEC, and DST. These formats are not just pictures; they are detailed instructions that guide the machine’s stitching sequence, color order, and thread movement. Without proper digitizing, the machine cannot interpret a regular image file.
Stitch Types That Recreate a Logo
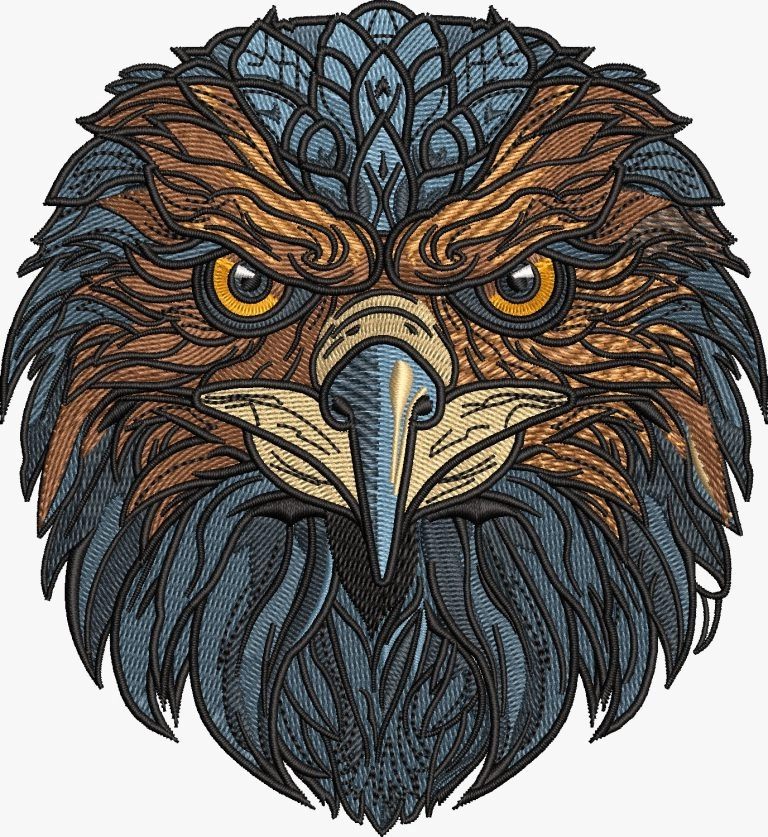
To make your logo look perfect in thread, a digitizer uses different stitch types such as satin stitches for outlines and letters, fill stitches for solid areas, and run stitches for fine details and borders. Each type is chosen carefully based on the logo’s design and fabric type.
Why Software Alone Is Not Enough
Many beginners try to use simple auto-digitizing software, but it cannot replace the precision and skill of a professional digitizer. Skilled digitizing requires both artistic judgment and technical knowledge of how stitches behave on fabric and how Babylock machines handle speed, tension, and density.
3. Why Babylock Machines Need Properly Digitized Files

Babylock’s Precision Depends on Stitch Data
Babylock embroidery machines are built with high precision and advanced sensors that read every stitch command in your file. These machines follow detailed instructions for needle movement, color changes, and stitch direction. For them to perform perfectly, the embroidery file must be accurately digitized.
Problems Caused by Poor Digitizing
If the file is not properly created, the machine cannot interpret the data correctly. This can lead to thread breaks, misaligned colors, uneven textures, or rough outlines. Such problems waste time, thread, and fabric, and can completely ruin an otherwise beautiful design.
Why Professionals Make a Difference
Professional digitizers know exactly how to prepare files for different Babylock models like Endurance, Vesta, or Meridian. They set the correct stitch density, angles, and underlays to ensure smooth running and perfect output.
File Quality Determines Output Quality
Even if you own the most advanced Babylock machine, your results will only be as good as the embroidery file you use. A perfectly digitized file guarantees flawless stitching, while a poorly made one limits the machine’s performance. That’s why professional digitizing is the key to achieving clean, precise, and reliable embroidery every time.
4. Step-by-Step: How to Convert a Logo for Babylock Embroidery
Step 1: Get a High-Quality Image
The first step in converting your logo is to start with a clear, high-resolution image. A clean logo with sharp edges, solid colors, and minimal shadows ensures accurate tracing and better stitch definition. Blurry or pixelated images can confuse the digitizing software and make it harder for the digitizer to create precise stitch paths.
Step 2: Choose the Right File Format
Babylock embroidery machines read PES and PEC formats, which are designed specifically for their systems. Although DST files are also widely used and compatible across different machines, PES files preserve color information more accurately. This helps your Babylock machine follow the correct thread sequence without mix-ups.
Step 3: Digitizing the Logo
Once the image is ready, professional digitizers manually trace the logo, defining each shape with specific stitch types such as satin, fill, or run stitches. They also adjust stitch directions, densities, and underlays to match the Babylock’s hoop size and stitching speed. This ensures clean outlines and balanced tension, even on complex designs.
Step 4: Test and Adjust
After digitizing, the file is tested virtually or stitched on fabric to identify any thread breaks, gaps, or uneven fills. Adjustments are made until the embroidery runs perfectly on the machine.
Step 5: Transfer the File to Babylock
Finally, the finished PES file is saved and transferred to the Babylock machine via USB drive or direct connection. Once loaded, it is ready for stitching, delivering smooth, professional-quality embroidery that matches your original logo exactly.
5. Common Mistakes When Using Auto-Digitizing Software
Auto Tools Misread Details
Auto-digitizing software may look convenient, but it often misreads gradients, curves, and fine text. The software tries to fill every area with the same pattern, which leads to awkward stitch flow and inaccurate shapes that look nothing like the original logo.
Stitching Problems
Because of poor stitch logic, auto-digitized designs frequently cause thread bunching, holes in the fabric, or misaligned color layers. When resized, these files lose their stitch density, making the embroidery too loose or overly tight.
Why Professionals Do It Better
Professional digitizers adjust every stitch manually. They understand fabric behavior, thread pull, and Babylock’s machine mechanics. By balancing stitch direction, density, and underlay, they ensure that even small logos look crisp and detailed. For reliable, high-quality results on Babylock machines, it’s always smarter to trust Digitizing Buddy instead of relying on quick software conversions.
6. Why Hiring a Professional Digitizing Service Is the Smart Choice
![]()
Professionals Understand Both Art and Machine
Embroidery digitizing is more than just turning an image into stitches, it’s about combining artistic design skills with technical machine knowledge. Professional digitizers understand how thread behaves, how fabric stretches, and how your Babylock embroidery machine interprets stitch data. They know the right stitch angles, pull compensation, and density settings to make every design run perfectly.
Files Optimized for Babylock Machines
Expert digitizers create files specifically optimized for Babylock’s hooping area, tension, and thread type. This ensures each logo sews out cleanly without breaks or distortion. Whether you’re using a Babylock Endurance, Vesta, or Meridian, professional files make the most of your machine’s capabilities.
The Benefits of Going Pro
A professionally digitized logo means:
-
Perfect stitch flow with no thread breaks
-
Balanced density for smooth coverage and crisp outlines
-
Clean lettering, even in small fonts
-
Less material waste, saving both time and fabric
Instead of spending hours fixing errors, you can start stitching confidently from the first run.
Cost vs. Value
Paying $10 to $25 for expert digitizing is a small investment compared to the cost of wasted thread, ruined garments, and hours of frustration. The value you get in consistency and quality easily outweighs the price.
Why Choose DigitizingBuddy
At Digitizing Buddy, prices start at $10 . We deliver rush orders in 2 to 4 hours, offer free edits until you’re 100% satisfied, and provide 24/7 live chat support with a money-back quality guarantee. Outsourcing your digitizing gives you complete peace of mind so you can focus on what matters your creativity and business growth.
7. How to Send Your Logo to Be Digitized
![]()
Getting your logo professionally digitized for your Babylock embroidery machine is quick, easy, and completely hassle-free. You don’t need any software or technical setup, everything is handled by experts who know exactly what your machine requires.
Simple Process
-
Upload your logo at Digitizing Buddy in any standard format such as JPG, PNG, or PDF.
-
Mention your machine model (Babylock) and the fabric type you’ll be stitching on so the file can be optimized for tension and density.
-
Choose your turnaround time go with a regular delivery or select the rush option if you need your file within a few hours.
-
Receive your ready-to-use PES file directly in your inbox, perfectly prepared for your Babylock embroidery machine.
The process is fast and completely stress-free, saving you from trial and error. You simply upload your design, wait a short while, and get a flawless, machine-ready file in return.
8. Tips for Perfect Stitch-Outs on Babylock Machines
To get flawless embroidery results on your Babylock machine, it’s not just about having the right file, it’s also about using the correct materials and maintaining your equipment properly. Here are a few key tips to ensure every stitch comes out clean and professional.
Choose the Right Stabilizer
Always match your stabilizer to your fabric type. Use tear-away stabilizers for firm fabrics like canvas or denim, cut-away stabilizers for stretchy materials such as knits, and wash-away stabilizers for delicate or sheer fabrics. A proper base keeps your stitches smooth and prevents puckering.
Use High-Quality Thread and Needles
Select premium embroidery threads like Madeira, Isacord, or Robison-Anton for vibrant colors and fewer breaks. Pair them with the correct needle , usually a 75/11 for general embroidery, and change needles regularly to maintain sharpness.
Test and Maintain
Always run a test stitch-out before starting bulk production to catch any color or density issues early. Clean your bobbin area and thread path regularly to avoid lint buildup. With good materials, maintenance, and a professional PES file, your Babylock machine will consistently deliver perfect, high-quality results.
9. Final Thoughts
Converting a logo to embroidery for your Babylock machine is simple, but only when it’s done right. While auto-digitizing tools may look like a quick solution, they often lead to uneven stitches, broken threads, and poor design quality. A professionally digitized file, on the other hand, guarantees smooth stitching, clean outlines, and long-lasting embroidery that truly represents your brand.
When experts handle the digitizing, your Babylock machine performs at its best, producing crisp, beautiful designs every time. So don’t risk your fabric or time with unreliable software — let professionals create the perfect file for you.
Get your logo professionally digitized for your Babylock embroidery machine today at DigitizingBuddy.com