Many new embroidery enthusiasts invest in a Tajima Sai thinking it can instantly turn any image or logo into beautiful stitches. But soon they realize the machine does not read regular image formats like JPG or PNG. It needs a digitized embroidery file to work properly. That is when the confusion begins. What does “converting an image” really mean?
Converting an image for your Tajima Sai is not about saving it in another format. It means transforming your picture into an embroidery file format that the machine understands, usually in DST or TBF format. These special files tell the machine exactly where to start stitching, how dense the threads should be, and when to change colors.
While it is possible to learn basic digitizing software, creating professional-quality files takes time, practice, and experience. That is why many Tajima Sai owners prefer hiring professional digitizing services like Digitizing Buddy, where experts ensure the design runs smoothly, looks perfect on fabric, and saves you hours of trial and error. By the end of this guide, you will know exactly how to do it right.
2. Understanding Tajima Sai File Compatibility
Preferred File Formats
The Tajima Sai embroidery machine supports two main file types: DST and TBF( the Tajima Binary File Format). The DST format is the long-standing Tajima standard used by most commercial embroidery machines, while TBF is a newer format designed specifically for the Tajima Sai. Both formats store detailed stitching information, such as where each stitch starts, its direction, density, and thread color changes.
Why Normal Images Don’t Work
Unlike regular image files such as JPG or PNG that contain pixels and colors, embroidery files like DST and TBF hold stitch commands. These commands act like a digital sewing map that the machine follows to recreate the design on fabric. That is why normal images must first be digitized before they can be used for embroidery.
Recommended Software and Quick Tip
Popular compatible programs include Wilcom Embroidery Studio, Pulse DG16, and Tajima DG16 by Pulse. They allow users to open, edit, and export files for the Tajima Sai. For best results and universal use, always save your file in DST format.
3. What is Embroidery Digitizing?
Understanding Digitizing in Simple Words
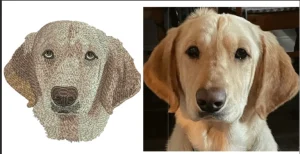
In embroidery, digitizing means converting a regular picture into a version made of stitches instead of pixels or colors. You can think of it as redrawing your design with thread so that the embroidery machine knows exactly how to stitch it.
From Pixels to Stitches
Every digital image is made of tiny dots called pixels, while embroidery designs are made of stitches. Digitizing tells the Tajima Sai how to turn each part of the picture into stitches. It decides how the lines, shapes, and shading should be sewn using stitch types such as satin, fill, or run stitches.
Why Skill Matters
A good digitizer chooses the right stitch type, direction, and underlay to make the design smooth, strong, and easy to sew. Automatic software can do some of the work, but it often misses small details like texture or fabric pull. That is why human skill is so important to make every design look neat and professional.
4. Preparing the Image Before Conversion

Choose a Clear, High-Quality Image
Before you start digitizing, make sure the image you are using is clean, sharp, and high contrast. Blurry or low-resolution pictures make it difficult for the software or digitizer to identify edges and details correctly. A clear image helps ensure smooth, accurate stitches and less cleanup later.
Simplify the Design
Embroidery works best with bold, simple designs. Reduce unnecessary colors, remove thin outlines, and avoid tiny text or overly detailed shading. The fewer distractions in your artwork, the cleaner your stitches will look when embroidered on fabric.
Convert to Black and White
Turning your image into a black-and-white version makes it easier to trace and separate different sections for stitching. It also helps visualize where to place fill, satin, or run stitches during digitizing.
Use Design Software for Cleanup
If your image needs touch-ups, use programs like Adobe Illustrator or CorelDRAW to refine edges, smooth curves, and simplify shapes before importing it into your embroidery digitizing software.
5. Step-by-Step: How to Convert an Image for Tajima Sai
Step 1: Choose Your Digitizing Software
Start by selecting a reliable embroidery digitizing program. Some of the best options include Wilcom Embroidery Studio E4, Tajima DG16 Pulse, and Ink/Stitch, which is a free open-source choice for beginners. These programs allow you to digitize designs manually or automatically. Manual digitizing gives you full control over stitch direction, density, and order, while auto-digitizing can provide a quick start for simple designs.
Step 2: Import Your Image
Open your software and load the image you want to convert. Most programs support formats such as JPG, PNG, or BMP. Once imported, resize the image according to your project. For example, use around 3 inches for caps or 10 inches for T-shirts. Always match your design size to your embroidery hoop to avoid distortion later.
Step 3: Use Auto-Digitizing (Optional)
If you are new to digitizing, you can try the auto-digitizing feature. It converts image colors into stitch areas automatically. However, remember that auto-digitizing is not perfect. You must review and clean up the results afterward. Unchecked auto-digitized files may cause thread breaks, uneven fills, or poor outlines, so always test and adjust them before production.
Step 4: Manually Adjust Stitch Types
For best quality, take time to manually refine the design. Add satin stitches for text and borders, fill stitches for large areas, and run stitches for fine outlines. Pay special attention to underlay stitching, which acts as a foundation for clean, stable embroidery. Adjust stitch density and pull compensation to suit the fabric type and keep the design smooth on the Tajima Sai. These small adjustments make a big difference in the final stitch quality.
Step 5: Preview and Simulate
Before saving, run a stitch simulation in your software. This lets you see exactly how your Tajima Sai will sew the design. Watch for overlapping stitches, unnecessary color changes, or jump stitches. Rearrange the sequence if needed to minimize trims and ensure a smooth flow from start to finish.
Step 6: Export to DST or TBF Format
Once satisfied, export your design in DST format (for universal use) or TBF format (specific to Tajima Sai). Transfer the file via USB drive or network connection to your embroidery machine. Always test the design on a scrap fabric first to confirm that the stitches run cleanly and the alignment is perfect before stitching on the final garment.