Few things are more frustrating than constant embroidery machine thread breaks in the middle of a design. Just when production starts flowing, the machine stops, the thread snaps, and you are left rethreading again and again. Over time, these interruptions do not just test your patience. They waste valuable production hours, increase labor costs, and can even damage garments that were meant for customers.
Repeated embroidery machine thread breaks also delay orders and hurt workflow efficiency, especially during busy seasons. Many embroiderers immediately blame the machine, but that is not always the full story. The root cause can be as simple as needle choice or tension, or it can be hidden inside the design file, such as excessive density, poor stitch direction, or unnecessary overlaps.
In this guide, you will get practical, step-by-step fixes to pinpoint the real cause and stop the breakage for good. And if you want to cut the hassle completely, hiring a professional digitizing service can make a big difference by optimizing the stitch file so it runs smoother, trims cleaner, and breaks thread far less often.
- 2. Understand Why Thread Breaks Happen
- 3. Check Your Needle First (Most Overlooked Cause)
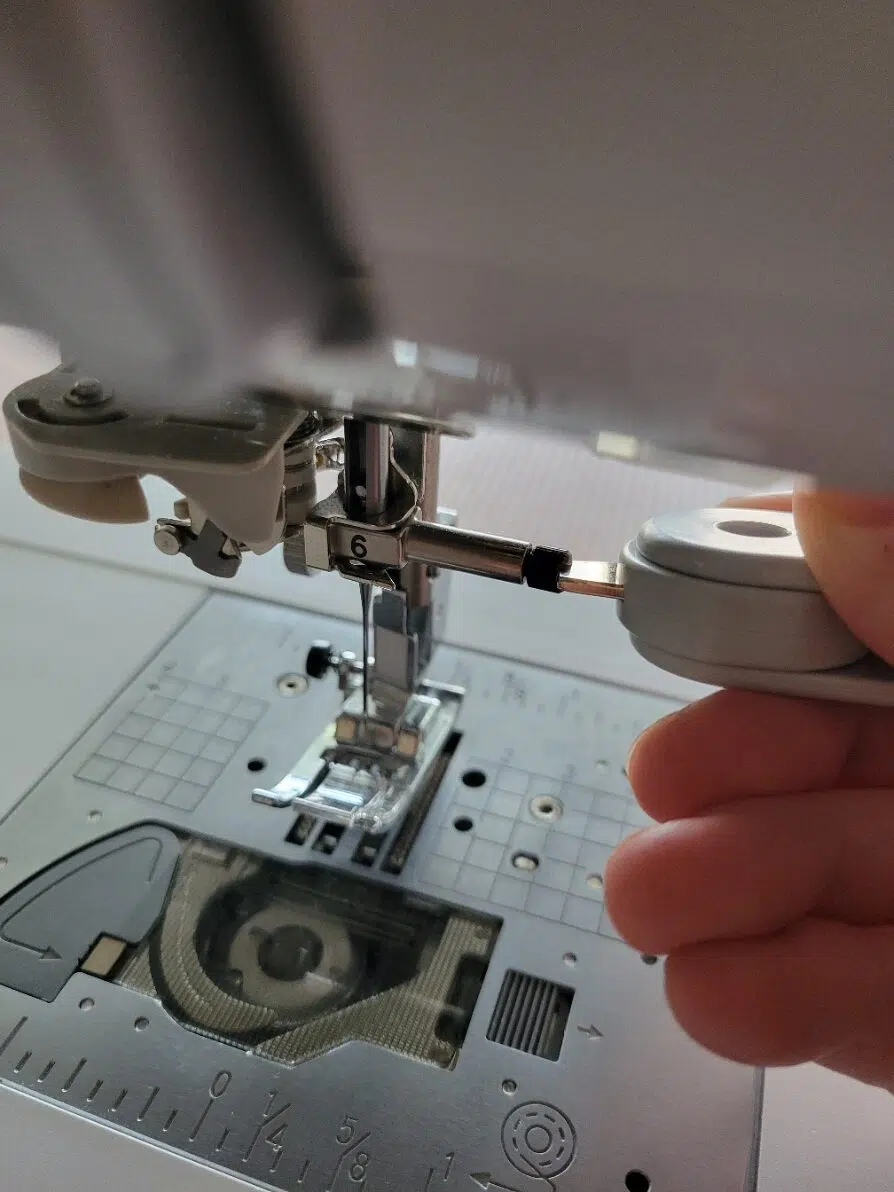
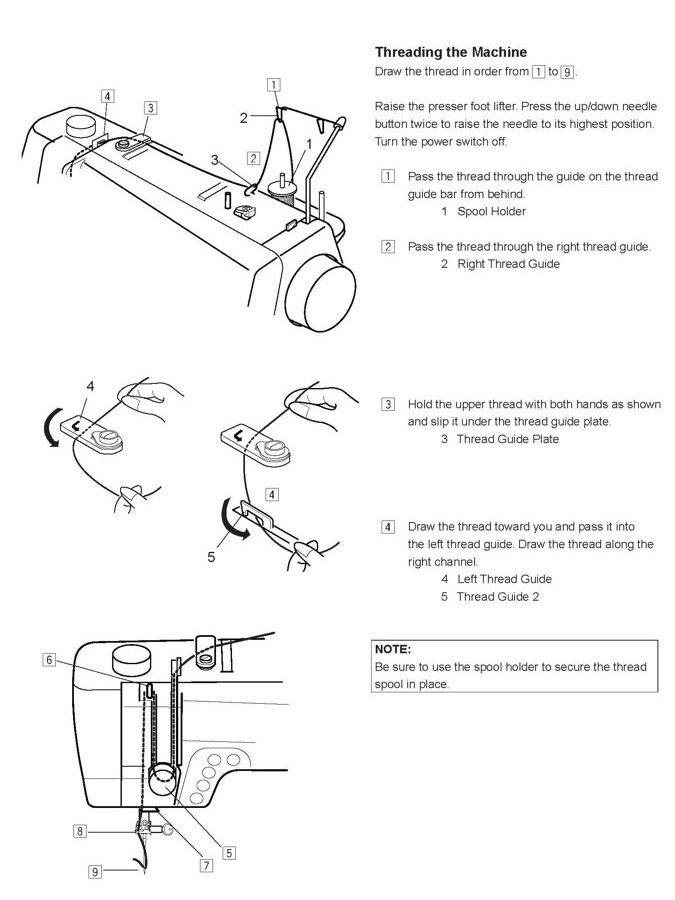
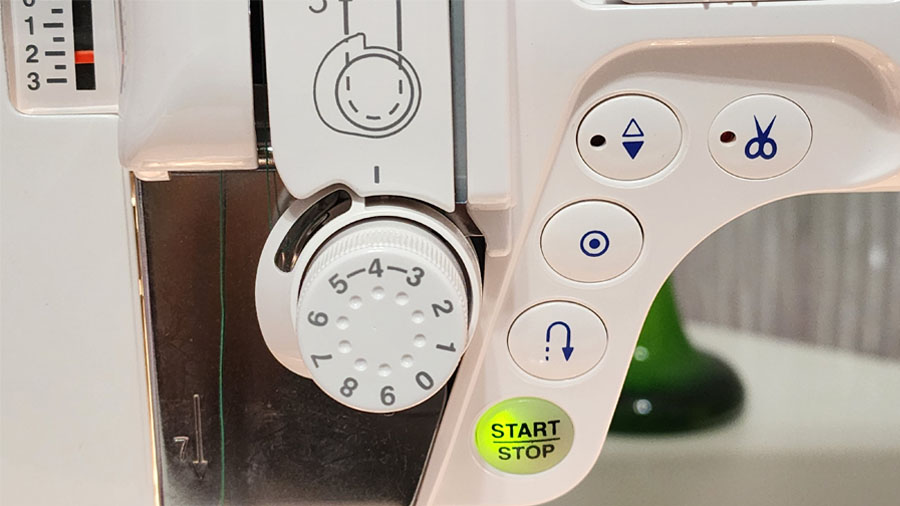
- 4. Rethread the Machine Properly
- 5. Adjust Top and Bobbin Tension
- 6. Slow Down the Machine Speed
- 7. Check Thread Quality
- 8. Fabric, Stabilizer and Hooping Issues
- 9. Dense or Poorly Digitized Designs (Hidden Cause)
- 10. How Professional Digitizing Reduces Thread Breaks
10. How Professional Digitizing Reduces Thread Breaks

Many embroiderers focus only on machine settings when dealing with thread issues, but the design file itself plays a major role. Poor digitizing can overload the machine with unnecessary stress, while professional digitizing is built to run smoothly from the start. When a design is properly prepared, it reduces friction, heat buildup, and excessive tension, which directly lowers the risk of thread breaks.
Proper Stitch Density
Correct stitch density is one of the most important factors. If too many stitches are packed into a small area, the needle repeatedly penetrates the same spot, creating friction and heat. This weakens thread and increases snapping. Professional digitizing carefully balances density based on fabric type, thread weight, and design size to ensure clean coverage without overcrowding.
Clean and Balanced Underlay
Underlay stitches provide a stable foundation for top stitches. When underlay is poorly planned or excessive, it creates unnecessary bulk. When it is missing or weak, the top stitches may sink or pull unevenly. A well-structured underlay stabilizes the design while minimizing excess buildup, allowing smoother stitching and less strain on the thread.
Correct Pull Compensation
Fabric naturally shifts and pulls during embroidery. Without proper pull compensation, stitches may become too tight or narrow, increasing tension stress. Professional digitizing accounts for fabric behavior and adjusts stitch width accordingly. This prevents tight satin columns and reduces pressure on the thread.
Logical Stitch Sequencing
Random or inefficient stitch sequencing forces the machine to jump back and forth unnecessarily. This increases trims, tension changes, and thread stress. Professional digitizers plan a logical stitch path that flows naturally across the design. Fewer abrupt direction changes mean smoother operation and reduced thread strain.
Reduced Trims and Jump Stitches
Excessive trims and jump stitches increase wear on thread and machine components. Every trim adds tension fluctuation and weakens the thread at the cut point. Optimized designs reduce unnecessary trims and clean up stitch transitions, resulting in more consistent thread performance.
When digitizing is done correctly, it protects more than just the thread. It reduces stress on the machine’s hook and needle system, prevents fabric puckering, and maintains consistent stitch quality. In the long run, investing in professionally digitized designs saves time, reduces material waste, and keeps production running efficiently with far fewer interruptions.
12. Preventative Maintenance Tips
Preventing thread breaks is far easier than constantly fixing them. A consistent maintenance routine keeps your embroidery machine running smoothly and reduces unexpected interruptions during production.
Clean Lint Daily
Embroidery creates lint buildup around the needle plate, bobbin case, and hook assembly. Over time, this debris interferes with smooth thread movement and tension balance. Cleaning lint daily, especially after long production runs, helps maintain consistent stitch quality and reduces friction inside the machine.
Oil the Machine as Recommended
Proper lubrication reduces internal friction between moving parts. Follow the manufacturer’s oiling schedule and use the recommended oil only. A well-lubricated hook system allows thread to move smoothly and minimizes stress during high-speed stitching.
Replace Needles Regularly
Even if a needle looks fine, it may be slightly dull or worn. Replacing needles regularly prevents fabric resistance and unnecessary thread strain. A fresh needle ensures cleaner penetration and smoother thread flow.
Test New Designs Before Bulk Runs
Never run a new design directly on customer garments. Always stitch a sample on similar fabric and stabilizer first. Testing helps identify density issues, tension imbalance, or potential thread problems before they become costly mistakes.
Simple preventative care protects your machine, improves stitch consistency, and dramatically lowers the chances of repeated thread breaks.