Ever wondered how to turn your favorite image into a stitch-ready design for your Husqvarna Viking embroidery machine? You’re not alone! With the rise of personalized gifts, small embroidery businesses, and creative DIY projects, more and more people are diving into custom embroidery. But before your design can be stitched out, it needs to be converted into a format your machine understands, like the HUS file format, which is specifically used by Husqvarna Viking embroidery machines.
If you’re new to this, don’t worry. In this blog, we’ll walk you through everything you need to know to convert an image to HUS, from understanding what a HUS file is, to choosing the right software, to common mistakes beginners should avoid. Whether you’re trying to digitize a logo, a drawing, or a photo, this step-by-step guide has you covered.
What Is a HUS File Format?

The HUS file format is a specific type of embroidery file used primarily by Husqvarna Viking embroidery machines. It tells your machine exactly how to stitch a design, including the type of stitches, color changes, and where to start and stop. Think of it as a digital map that guides your machine through every step of the embroidery process.
HUS files contain essential data like stitch coordinates, thread colors, and machine commands, making them a complete package for executing an embroidery design. Without the right file format, your machine can’t interpret the design correctly, which can lead to messy results or stitching errors.
While there are many embroidery file formats, like PES (Brother), DST (Tajima), JEF (Janome), and EXP (Bernina), each is tailored to specific machine brands. The HUS format is optimized for Husqvarna machines, ensuring better compatibility and smoother stitching.
Using the correct format is crucial. It avoids conversion issues, reduces the chance of embroidery mistakes, and ensures your final result looks just like the design on your screen.
Can You Convert an Image Directly to HUS?
Many beginners wonder if they can simply upload a JPG or PNG image and start stitching—but it’s not that simple. Embroidery machines don’t read regular image files like photos or graphics. Instead, they need a design that’s been digitized, which means converting the image into a set of stitch instructions the machine can follow.
This is where digitizing comes in. It’s the process of transforming an image into an embroidery file by assigning stitch types, directions, and densities. You’ll need special software to do this.
The conversion happens in two steps:
-
Use embroidery digitizing software to turn the image into a stitch file (like EMB, PES, or DST).
-
Then, export or save the file in HUS format, so it’s compatible with your Husqvarna Viking machine.
So no, you can’t directly convert an image to HUS—but with the right steps, it’s easy to get there.
Best Software for Converting Image to HUS File Format

To convert an image into a HUS embroidery file, you’ll need embroidery digitizing software that supports both design creation and HUS file export. Here are some of the best tools available, whether you’re looking for professional-grade performance or something more budget-friendly.
Paid Options:
-
Wilcom Embroidery Studio
This is the gold standard in the embroidery world. Wilcom offers unmatched precision, wide format compatibility (including HUS), and advanced editing tools. It’s ideal for professionals who demand flawless stitch control and high-end results. -
Hatch Embroidery Software
Created by Wilcom, is designed for beginners and hobbyists but still packs a punch. It’s user-friendly, feature-rich, and supports exporting to HUS format, making it perfect for small businesses and serious DIYers. -
Embird
A more affordable option, Embird allows you to digitize images and save in various formats, including HUS. It’s modular, so you can add features as needed, and it’s known for being reliable and flexible.
Free or Budget-Friendly Options:
-
Ink/Stitch
This is a free, open-source extension for Inkscape. It’s great for basic digitizing tasks, though direct HUS export may not always be supported. You might need to convert to another format first, then use a separate tool to get HUS. -
SewArt
A low-cost digitizing tool that’s easy to use and supports HUS output. It allows you to import images, auto-digitize them, and export directly in the HUS format—ideal for beginners on a budget.
Note: Some free tools may require plug-ins or extra conversion steps to create HUS files, so double-check compatibility before starting.
Step-by-Step: Convert Image to HUS File
If you want to convert an image into a HUS embroidery file, follow these easy steps to get professional-quality results. The HUS format is commonly used with Husqvarna Viking embroidery machines, and it requires precise digitizing for smooth stitching. Here’s how to do it step-by-step.
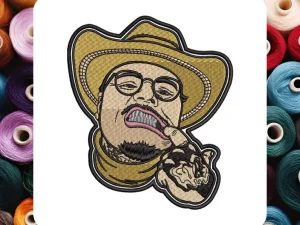
Step 1: Choose a Clean, High-Quality Image
Start by selecting an image with sharp lines and solid colors. Vector files like SVG or high-resolution PNGs work best. Avoid blurry or overly complex photos. Designs with simple shapes and minimal gradients are easier to digitize and give better stitching results.
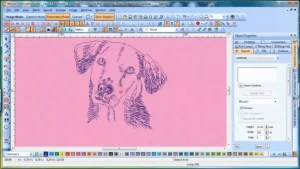
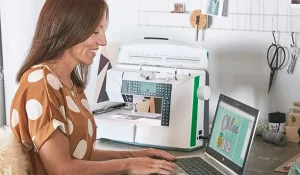
Step 2: Import the Image into Embroidery Digitizing Software
Open your embroidery digitizing software, such as Hatch Embroidery or SewArt. These tools allow you to load your image and prepare it for conversion. Adjust the image size based on your hoop requirements. If your software supports it, remove the background or clean up any noise to isolate the main design. This step helps prevent unwanted stitches and keeps the file lightweight.
Step 3: Digitize the Image
Next, start the digitizing process. You can manually assign stitch types like satin stitches for borders and fill stitches for larger areas. If you’re using auto-digitizing software, it will automatically convert the image into stitch data, but manual tweaks often improve the final look. Pay attention to stitch angle, density, and trimming commands to avoid bulky or loose stitches.
Step 4: Preview the Design
Once digitized, preview the design in your software’s simulator. This shows how the design will look once stitched onto fabric. Look for any gaps, overlaps, or irregular stitch paths and refine them as needed for a clean finish.
Step 5: Save or Export as HUS File
Finally, export your file in the HUS format. Most software will let you choose HUS from a dropdown list of formats. Always save a working file (like EMB for Hatch or SVG) so you can make edits later without starting from scratch.
How to Test Your HUS File
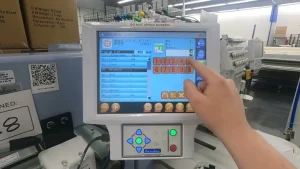
Once you’ve created your HUS file, it’s essential to test it before stitching on the final garment. Start by loading the HUS file into your embroidery machine using a USB drive or the machine’s compatible software. Select a piece of scrap fabric that closely matches the material you’ll use for the final product. Run the design as a test stitch-out.
During the test, watch for any thread breaks, incorrect color changes, or alignment issues. Uneven stitching, puckering, or unnecessary jumps may indicate problems in the digitized file. If you notice any flaws, go back to your digitizing software, make the necessary adjustments—such as refining stitch angles or reducing density—and re-export the corrected file in HUS format.
Why Hiring a Professional Embroidery Digitizing Service Like Digitizing Buddy Is a Smarter Choice
Learning to digitize your own embroidery designs sounds exciting at first—but in reality, it’s a major investment of both time and money. Good digitizing software can cost hundreds of dollars, and even free options come with limitations and a steep learning curve. It’s not just about clicking a few buttons; it takes practice, patience, and technical know-how to get clean, stitch-ready files.
Hiring an in-house digitizer might seem like a solution, but that adds to your overhead—salaries, training, software licenses, and more. If you’re running a small business or just starting out, that’s a lot to take on.
That’s why outsourcing to a professional embroidery digitizing services makes sense. It’s a hassle-free, cost-effective alternative that lets you skip the tech headaches and focus on what matters. Services like Digitizing Buddy offer HUS file conversions starting at $10, with fast turnaround, free edits, and no software required on your end. You get accurate results without burning time or resources—making it a smarter choice for many embroiderers and business owners.