Embroidery machines like BAi have changed the way creativity meets fabric. With just the push of a button, they can turn flat artwork into stunning stitched designs that catch the eye and add a professional touch to garments, caps, and more. But here’s the secret—getting from artwork to a flawless embroidery output isn’t as simple as saving an image and loading it into your BAi machine. Images are made of pixels, while embroidery runs on stitches, and that’s where digitizing comes in.
Digitizing is the process of translating artwork into a stitch-ready embroidery file that your BAi machine can actually understand. Without it, even the best designs won’t sew properly, leading to thread breaks, misaligned patterns, or wasted fabric.
In this blog, we’ll walk you through how to convert your artwork into BAi embroidery machine format the right way. From understanding what “conversion” really means to exploring DIY tools and professional embroidery digitizing services, you’ll get all the insights you need to bring your designs to life with flawless results.
- Understanding BAi Embroidery Machines
- What Does “Conversion” Really Mean?
- DIY Conversion: Is It Possible?
- Essential Tools and Software for BAi File Conversion
- Step-by-Step Process to Convert logo for BAi Machines
- Common Problems Without Proper Digitizing
- Why Professional Digitizing Services Are Smarter
- Conclusion
Understanding BAi Embroidery Machines
Overview of BAi
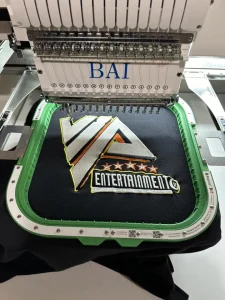
BAi is a well-known name in the embroidery industry, popular for its balance of affordability and reliability. These machines are designed to deliver professional-quality stitching without the high costs of premium brands. With multi-head options and user-friendly controls, BAi machines are a strong choice for businesses looking to scale production while keeping budgets under control.
Who Uses BAi Machines
BAi embroidery machines are commonly used by small businesses, embroidery startups, and local shops that handle custom apparel, caps, and promotional items. Their ease of use makes them accessible for beginners, while their durability appeals to more experienced embroiderers.
File Formats Supported
BAi machines can read widely recognized embroidery file formats such as DST and DSB. These formats make it simple to access digitized designs and share them across different embroidery setups.
Importance of Proper Digitizing
Even with the right file format, success depends on high-quality digitizing. Proper digitizing ensures correct stitch paths, underlay, and density adjustments so the design runs smoothly on the machine. This reduces thread breaks, minimizes downtime, and produces clean embroidery that customers will appreciate.
What Does “Conversion” Really Mean?
File Conversion vs. Digitizing
Many people think converting artwork for embroidery is as simple as changing a file type, but that is not the case. File conversion only changes the format, while embroidery digitizing translates artwork into stitch commands that a BAi machine can understand.
Role of Stitch Planning
Digitizing involves carefully planning the stitch path so the machine knows where to start, how to move, and where to finish. Along with this, underlay stitches are added to stabilize the fabric and support the top stitches. Density settings control how thick or thin the stitching appears, while trims manage thread cuts between sections.
Risks of Poor Conversion
When digitizing is not done correctly, the design can create constant problems during production. Improper density can cause thread breaks, weak underlay can lead to misalignment, and bad sequencing can leave a design looking messy and unfinished. In short, poor conversion wastes time, fabric, and money while hurting the final product’s quality.
DIY Conversion: Is It Possible?
Pros of DIY Conversion
For hobbyists or creative individuals, converting artwork on their own can feel rewarding. Doing it yourself saves the cost of hiring a professional digitizer, which can be appealing for small personal projects. It also gives you complete control over how your design looks, allowing you to experiment and learn the process hands-on.
Cons of DIY Conversion
The downside is that embroidery digitizing has a steep learning curve. Professional software such as Wilcom or Hatch is quite expensive, and mastering it takes time and practice. Even after investing in software, creating production-ready files can be slow and frustrating, especially when you are new to the process.
Free Auto-Digitizing Tools
There are free auto-digitizing tools available, but they often come with limitations. These tools usually generate generic stitch patterns without proper path planning or fabric considerations. The result is often a design that looks acceptable on screen but fails during the sew-out.
When DIY Makes Sense
DIY conversion makes sense for personal use, experimentation, or small one-off projects. However, for commercial production or customer orders, professional digitizing is usually the smarter and more reliable choice.
Essential Tools and Software for BAi File Conversion
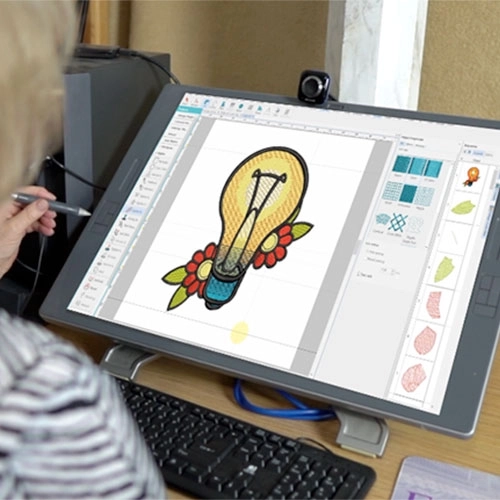
Digitizing Software Options
The first tool you need for converting artwork to a BAi embroidery machine format is digitizing software. Popular paid options include Wilcom, Hatch, and Chroma, which offer professional features for precise stitch control. For beginners or those on a budget, free programs like Ink/Stitch can be a starting point, but they lack the advanced functions required for flawless commercial designs. Choosing the right software depends on whether you are experimenting for fun or preparing files for business use.
Image Preparation Tools
Before importing an image into embroidery software, it often requires cleanup. Vector editing programs help resize, smooth edges, and remove unnecessary details. A clean, simplified image is easier to digitize and leads to smoother stitch paths.
File Output for BAi Machines
Once the design is digitized, it must be exported in a format that BAi machines can read. The most common formats are DST and DSB, both widely supported and reliable for commercial embroidery production.
Needles and Threads for Testing
Finally, never underestimate the role of hardware. Choosing the right embroidery needles and thread brands is essential when testing your new file. Good-quality needles prevent breakage, while strong, colorfast threads ensure the design looks sharp and professional on the finished product.
Step-by-Step Process to Convert logo for BAi Machines
1. Prepare Your Artwork
Start by cleaning up your artwork. Remove unnecessary details, sharpen edges, and resize the design to the exact dimensions you need. If possible, vectorize the artwork so it is easier to scale without losing clarity. A clean image gives you a strong foundation for digitizing.
2. Import into Digitizing Software
Load the prepared artwork into your chosen digitizing software such as Wilcom, Hatch, or Chroma. This is where the real conversion begins, as the software allows you to assign stitches that your BAi machine can interpret.
3. Assign Stitch Types
Decide which stitch types best suit each part of the design. Satin stitches are ideal for letters and borders, fill stitches cover large areas, and run stitches are used for fine lines. Choosing the right stitch type ensures both durability and visual appeal.
4. Add Underlay for Structure
Underlay stitches provide stability by securing the fabric before the top stitches are laid down. They reduce puckering and give the design a cleaner finish, especially on stretchy materials.
5. Adjust Density, Pull Compensation, and Trims
Fine-tune the stitch density to avoid thread breaks or overly heavy designs. Apply pull compensation so the design doesn’t shrink or distort on fabric. Plan trims carefully to avoid excess thread between design sections.
6. Sequence Planning
Arrange the stitching order so colors flow naturally with minimal thread changes. A good sequence reduces machine stops and speeds up production.
7. Export in BAi-Compatible Formats
Once satisfied, export the file in a format BAi machines can read, such as DST or DSB.
8. Test Sew-Out
Always run a test sew-out on a similar fabric before bulk production. This helps identify issues and ensures the design looks perfect on the final product.
Common Problems Without Proper Digitizing
Thread Breaks from Wrong Density
If stitch density is set too high, threads rub against each other and break frequently during production. On the other hand, low density can leave gaps, making the design look unfinished. Both problems waste time and create frustration.
Misaligned Designs from Poor Underlay
Underlay stitches act as the foundation of embroidery. Without proper underlay, designs can shift during sewing, leading to outlines that do not line up with fills or letters that look crooked. This misalignment lowers the professional quality of the work.
Fabric Puckering Without Compensation
Pull compensation helps balance the tension of stitches on fabric. Without it, the design may shrink or stretch during embroidery, causing puckering. The end result is a distorted pattern that looks unprofessional and cannot be sold with confidence.
Machine Stops from Corrupted Formats
If the design file is not exported properly, it may cause the BAi machine to stop mid-production. Corrupted formats or unsupported commands not only interrupt work but also risk damaging the fabric already in the frame.
The True Cost of Mistakes
Every mistake in digitizing comes at a price. Wasted fabric, extra machine time, and disappointed customers can damage both profits and reputation. That is why high-quality digitizing is essential for smooth and reliable embroidery production.
Why Professional Digitizing Services Are Smarter
Save Time and Focus on Business
Learning embroidery digitizing from scratch takes months of practice and costly software investments. By outsourcing to professional Digitizers, you skip the long learning curve and free up your time to focus on running and growing your embroidery business.
Skilled Digitizers with Experience
Professional services provide access to digitizers who have spent years mastering stitch techniques, density adjustments, and underlay planning. Their expertise ensures that your designs run smoothly on BAi machines without constant trial and error.
Affordable and Flexible Pricing
Many services now offer hybrid pricing models, starting as low as $10 per logo. This makes professional digitizing accessible even for small shops while still delivering high-quality results suitable for bulk production.
Added Features for Convenience
Top digitizing companies also include benefits such as unlimited edits until you are satisfied, rush orders completed in as little as two hours, and attractive bulk discounts for repeat customers. These extras provide peace of mind and keep your production schedule on track.
Digitizing Buddy is your best choice
Get your BAi file conversion done professionally at Digitizing Buddy. With affordable pricing, quick turnaround, and flawless results, you can focus on your customers while experts handle the stitch work.
Conclusion
Converting artwork to a BAi embroidery machine format is far more than just saving a file. It is the art of digitizing, where every stitch is carefully mapped to ensure smooth operation and beautiful results. Without proper digitizing, even the best artwork can turn into broken threads, puckered fabric, and wasted time.
For those curious about the process, trying DIY can be a fun way to learn and experiment on small personal projects. However, when it comes to business orders or large production runs, relying on experts is the smartest choice. Professional digitizers bring years of experience, advanced tools, and the skill to deliver designs that run flawlessly on your BAi machine.
Order your BAi embroidery file conversion today at Digitizing Buddy get instant quotes, same-day turnaround, and flawless stitch results. Save time, avoid costly mistakes, and let your designs shine with precision and quality